Lost Wax Process for Bronze Casting
The lost wax process for creating bronze sculptures is thousands of years old (pieces 6000 years old have been found in the ancient Mesopotamian and Egyptian regions). Also known as “investment casting”, this method of art was widespread in Europe until the 18th century. Although bronze sculptures are still being done, they are often through a foundry. I had the challenge and pleasure of learning the lost wax process and pouring several of my own pieces.
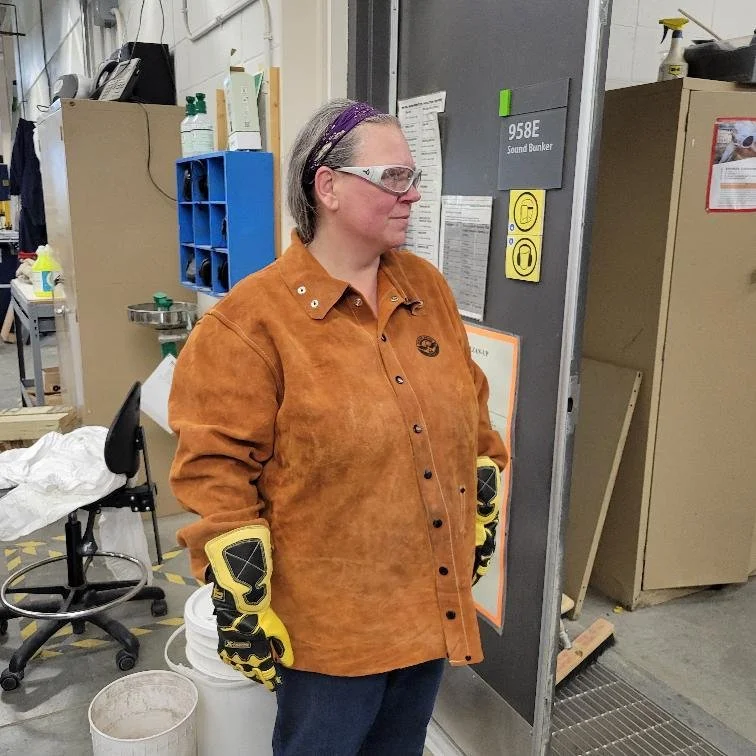
Ready in my PPE gear for Bronze
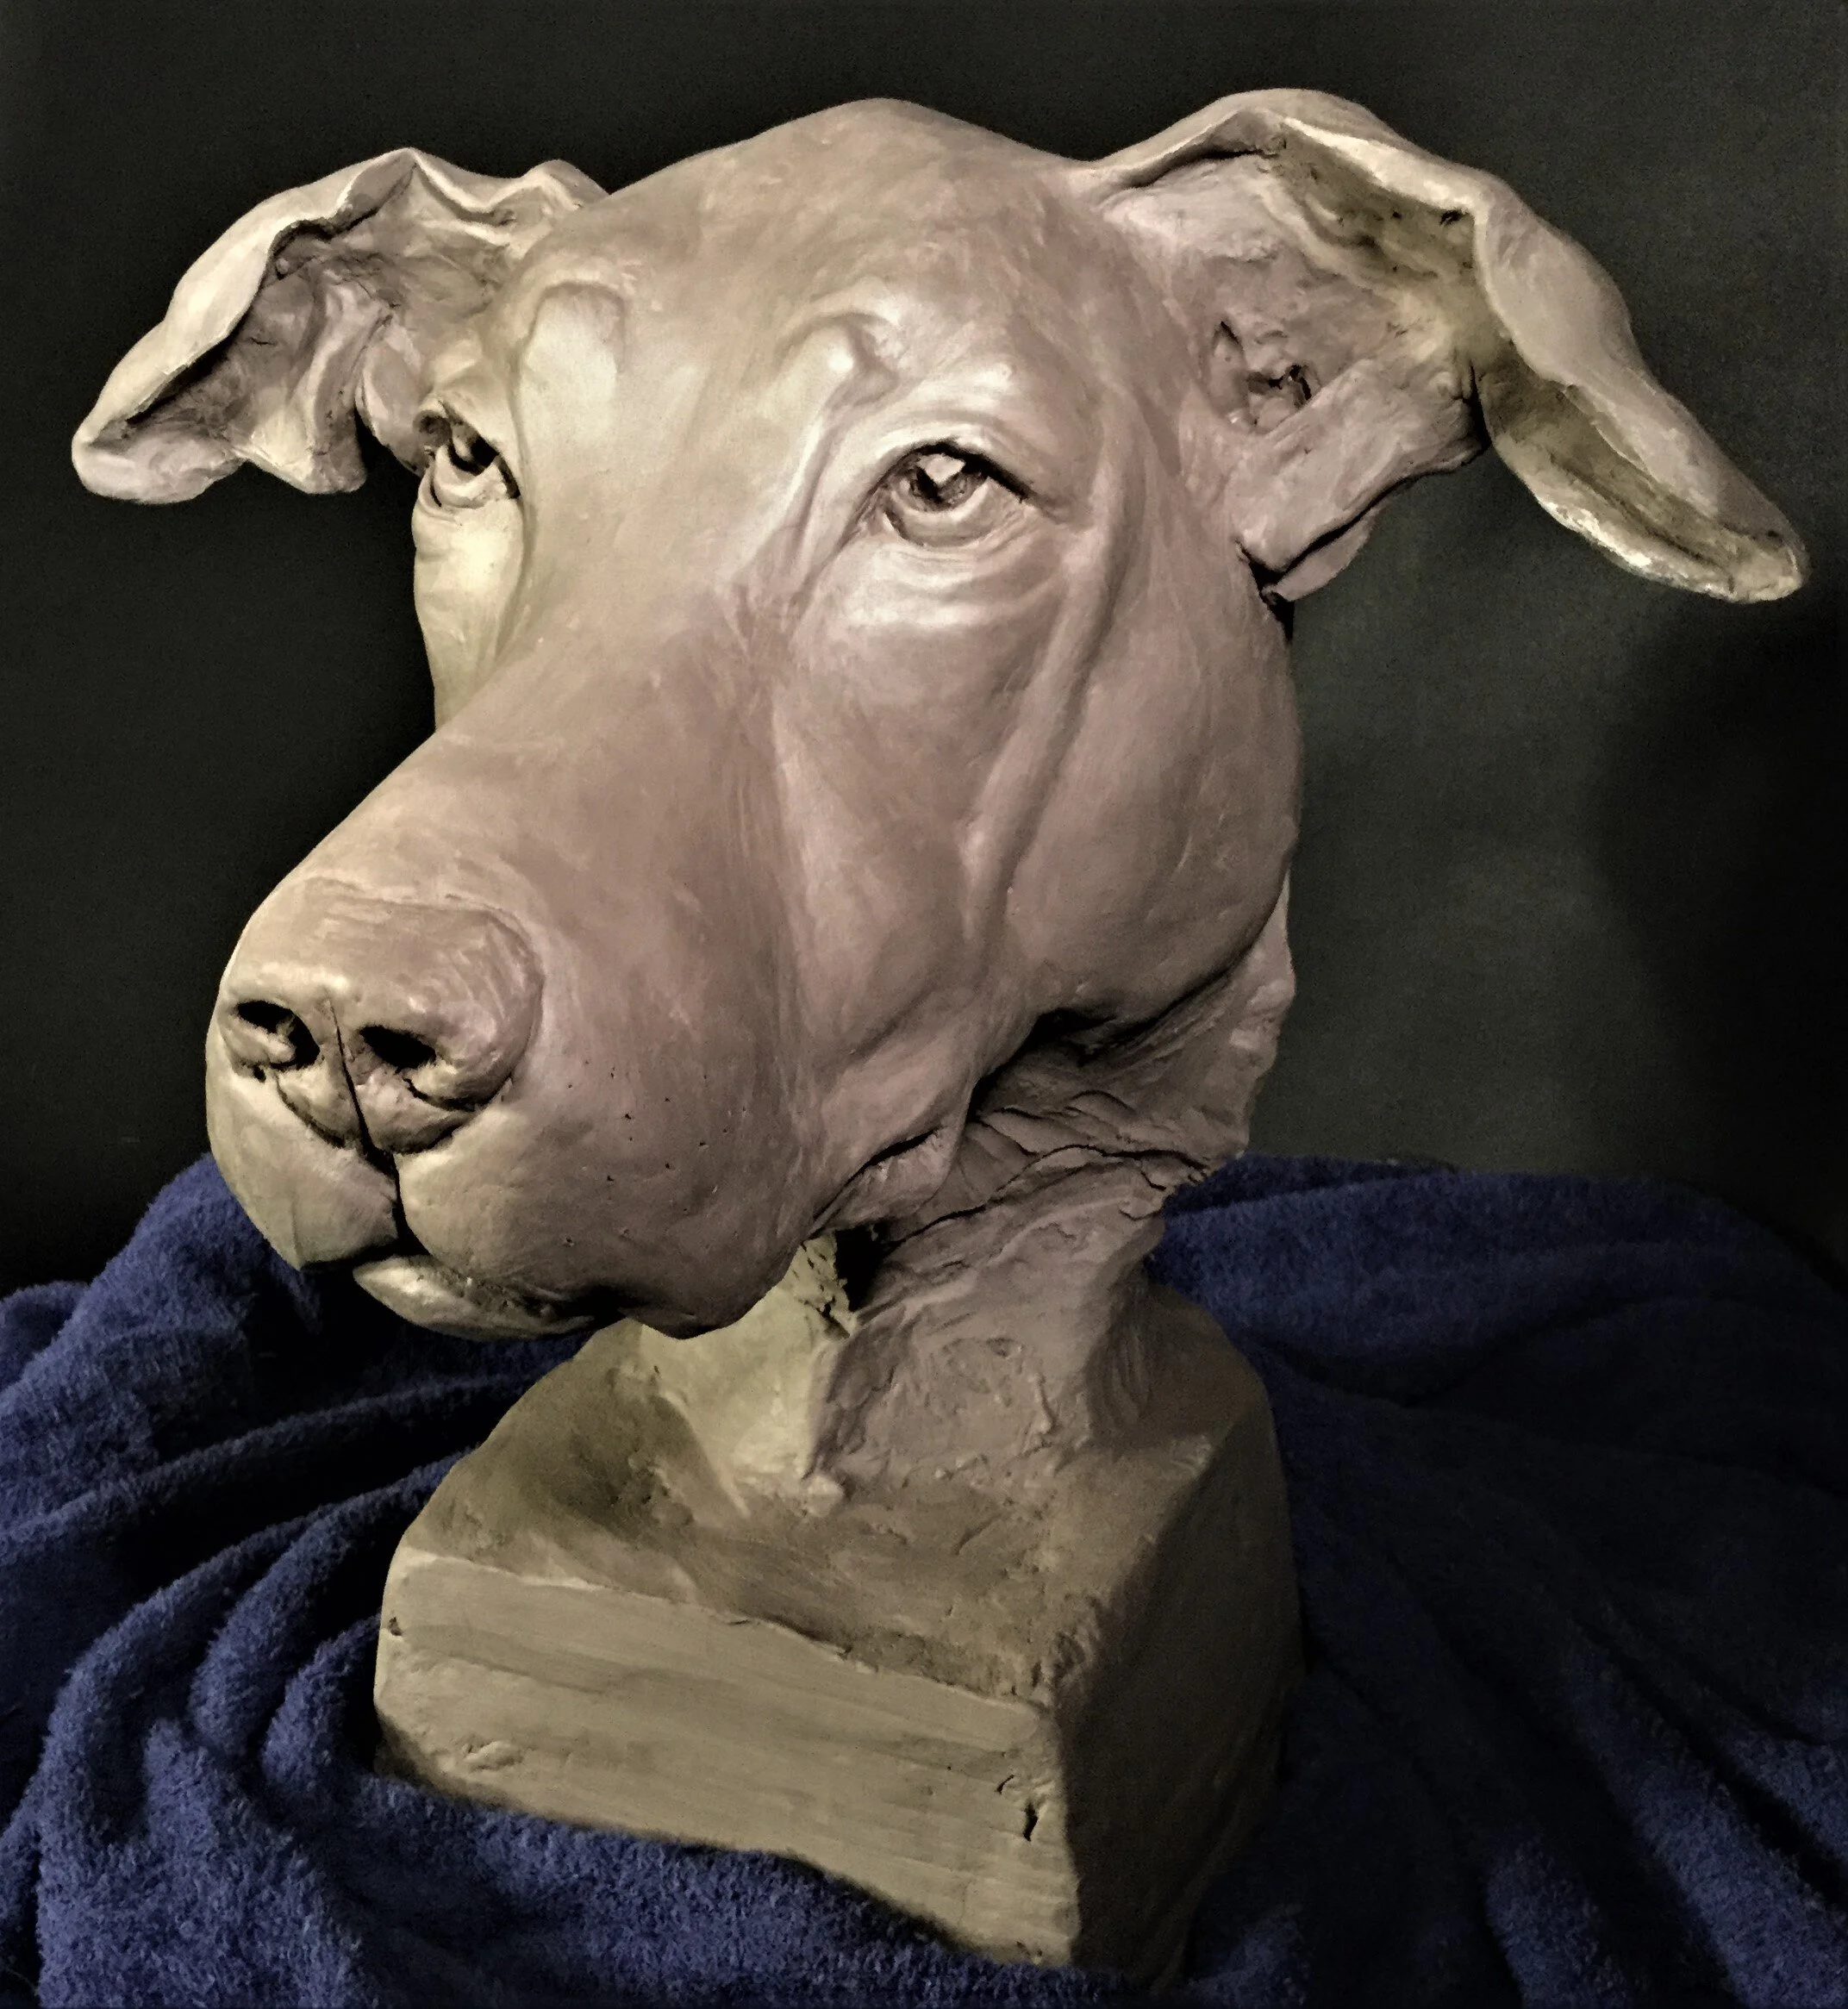
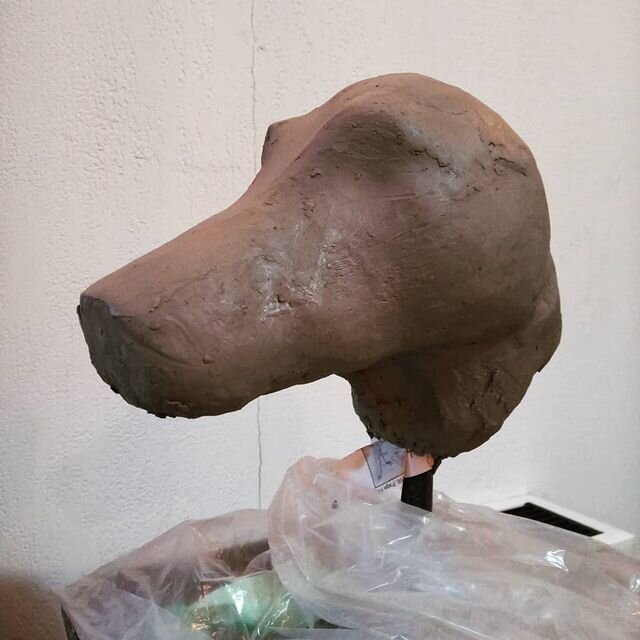
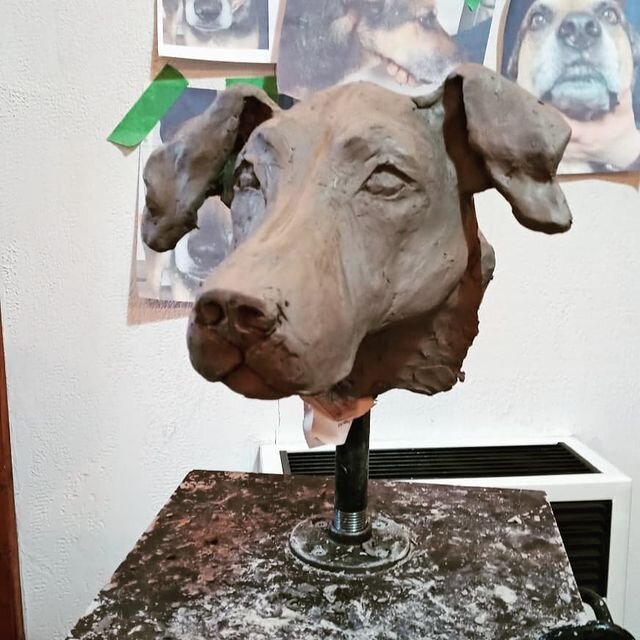
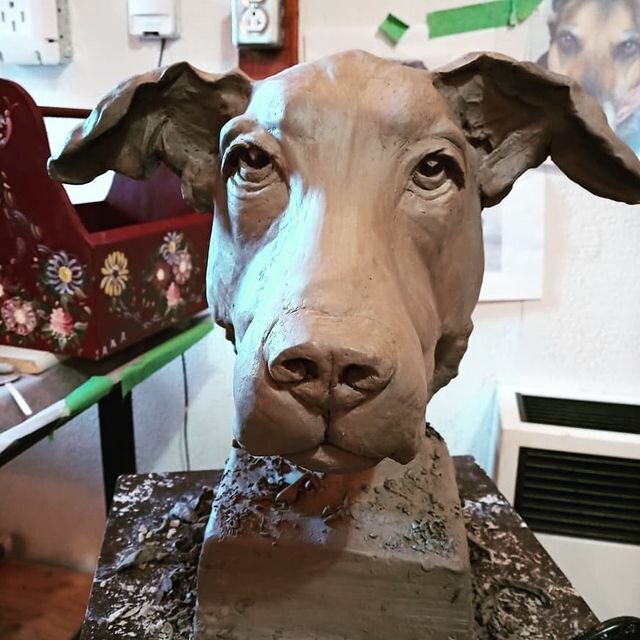
Sculpting in Clay
Each sculpture starts with a clay original. This piece was done in WED (Walt Disney Clay) with a metal armature inside. Painstakingly sculpted by hand this can take 1 to 3 weeks to complete depending on the subject.
I also use plasticine/plastelina (Roma Clay) which is oil based and never dries. I sometimes work also in polymer clay.
Once the sculpture is completed they must be sealed with shellac or acrylic sealant to prepare for molding.

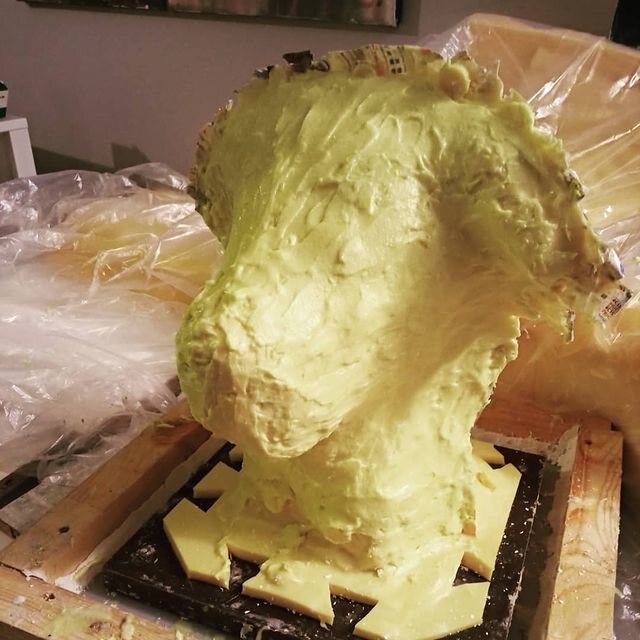
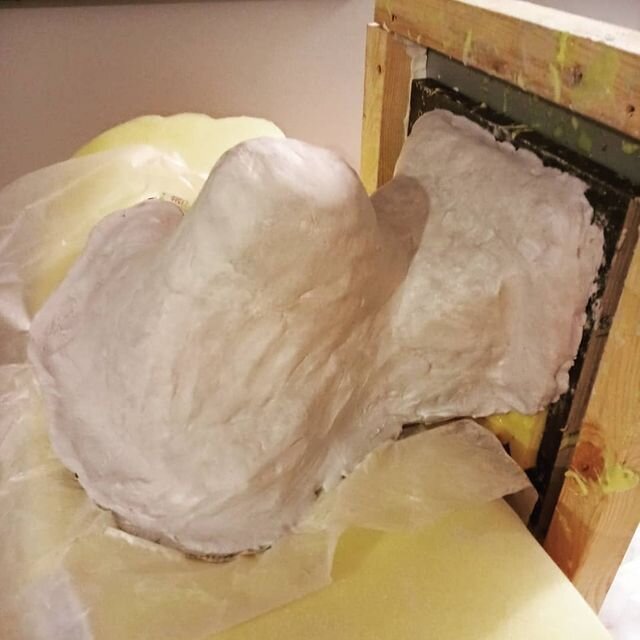
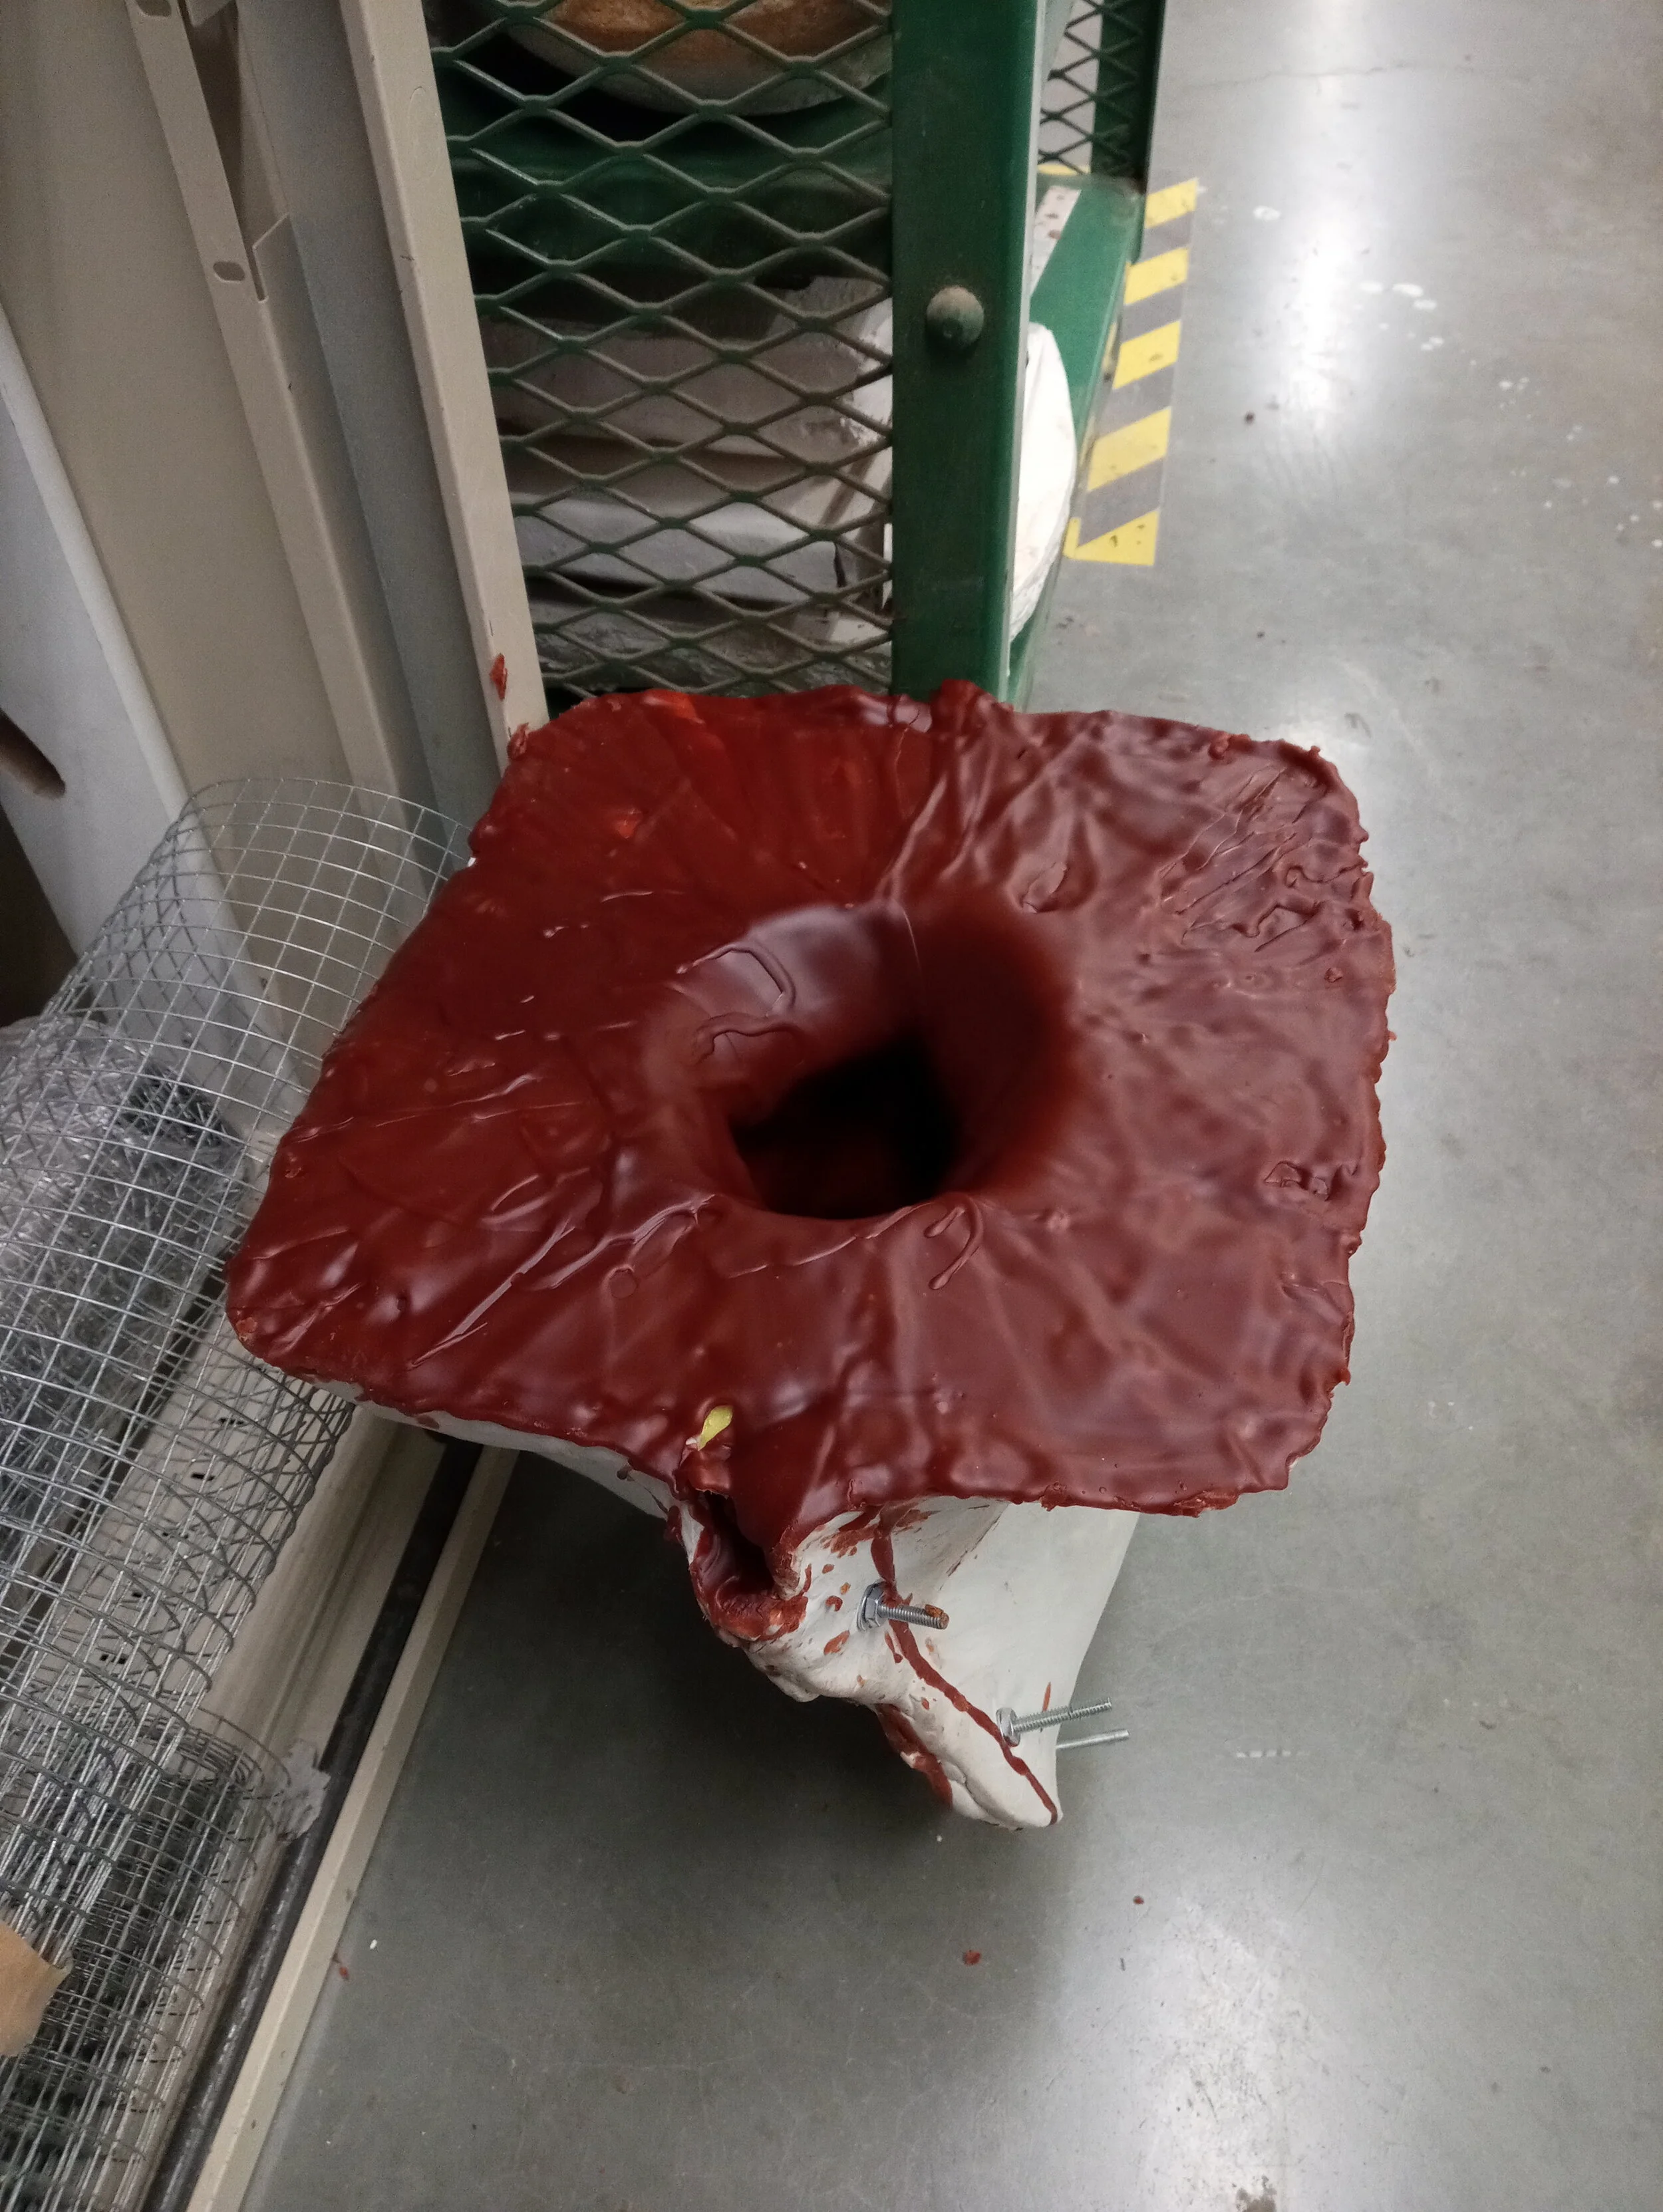
Creating a Mold
From the clay original sculpture, a mold is made. They are often separated into several “sections”. The first layers are liquid rubber and the outer layer is hard “mother mold” which is composed of plaster or other hard mold materials. This process takes 1 to 2 weeks to complete.
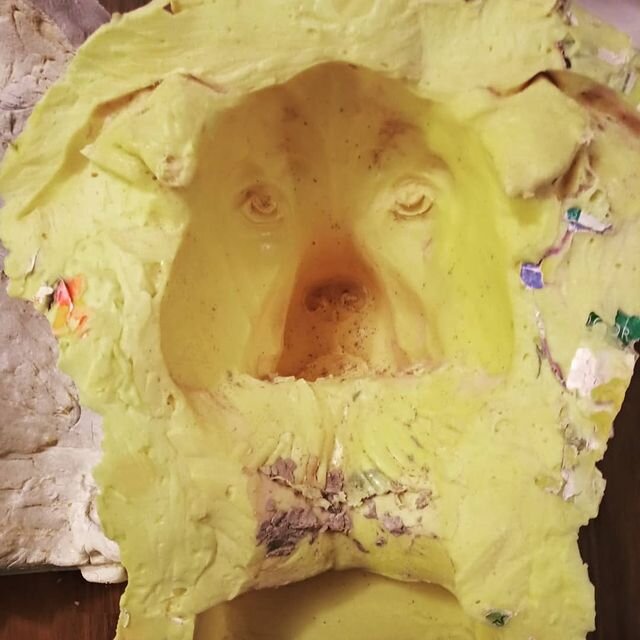

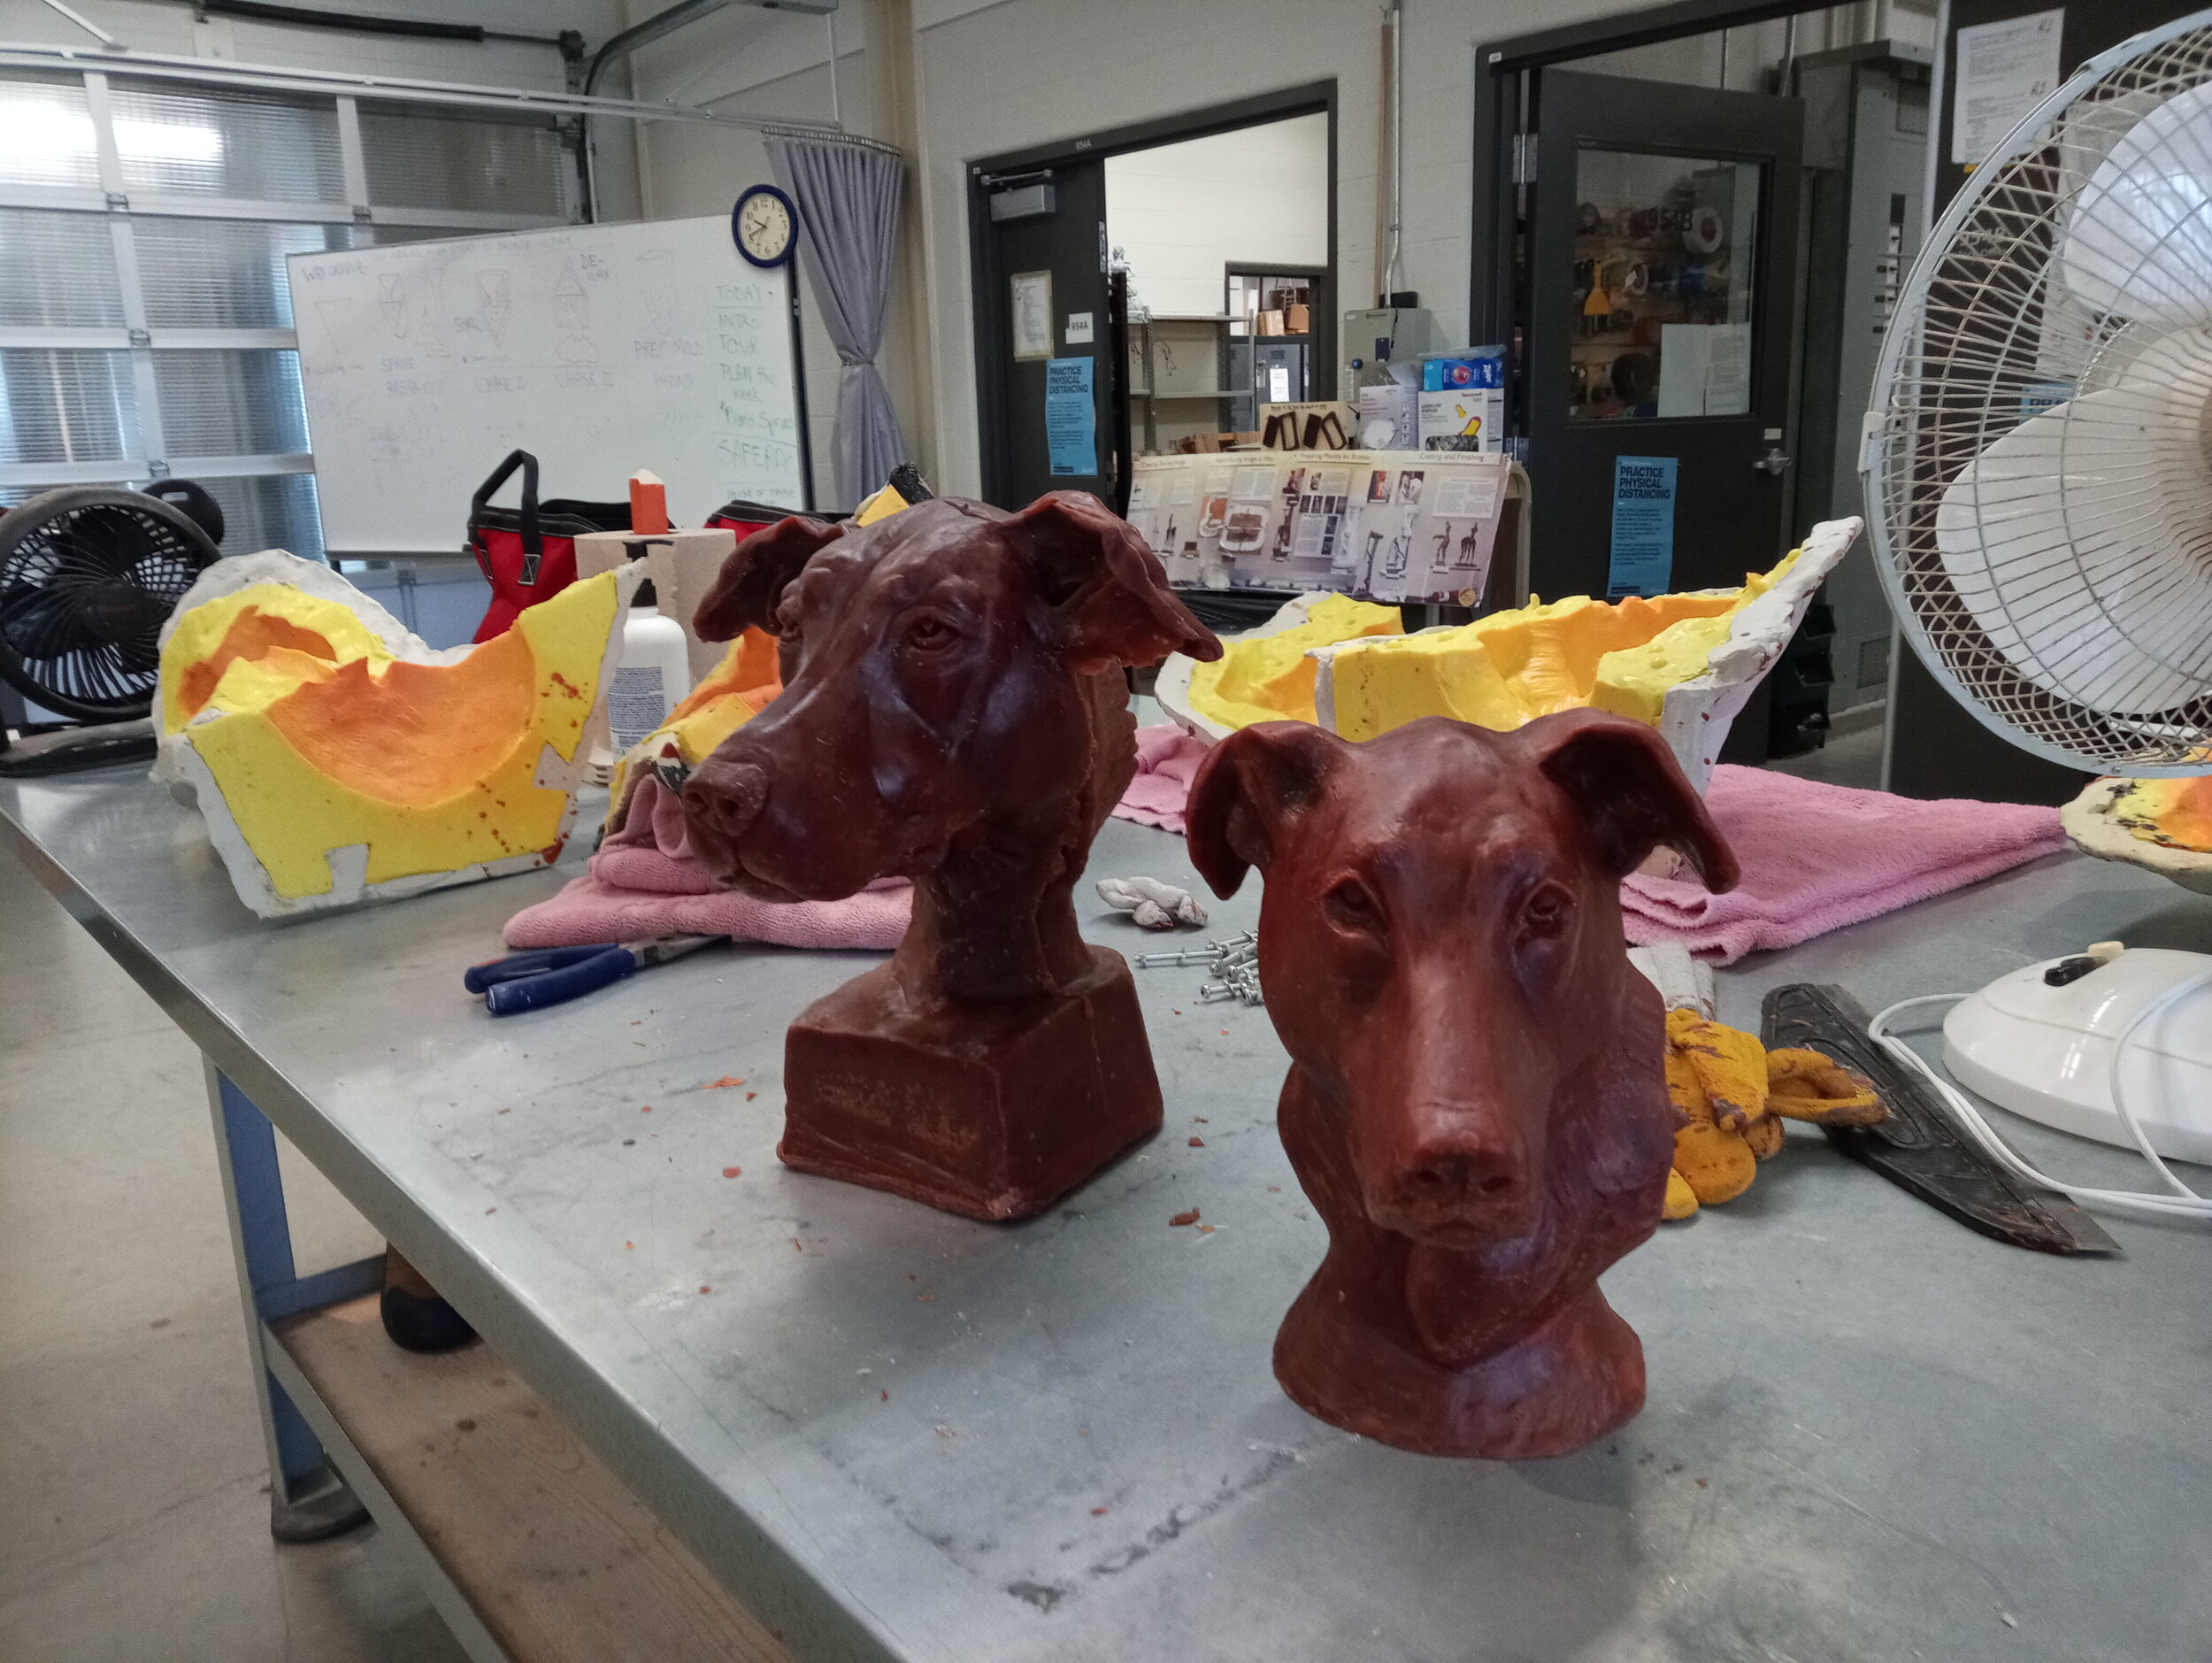
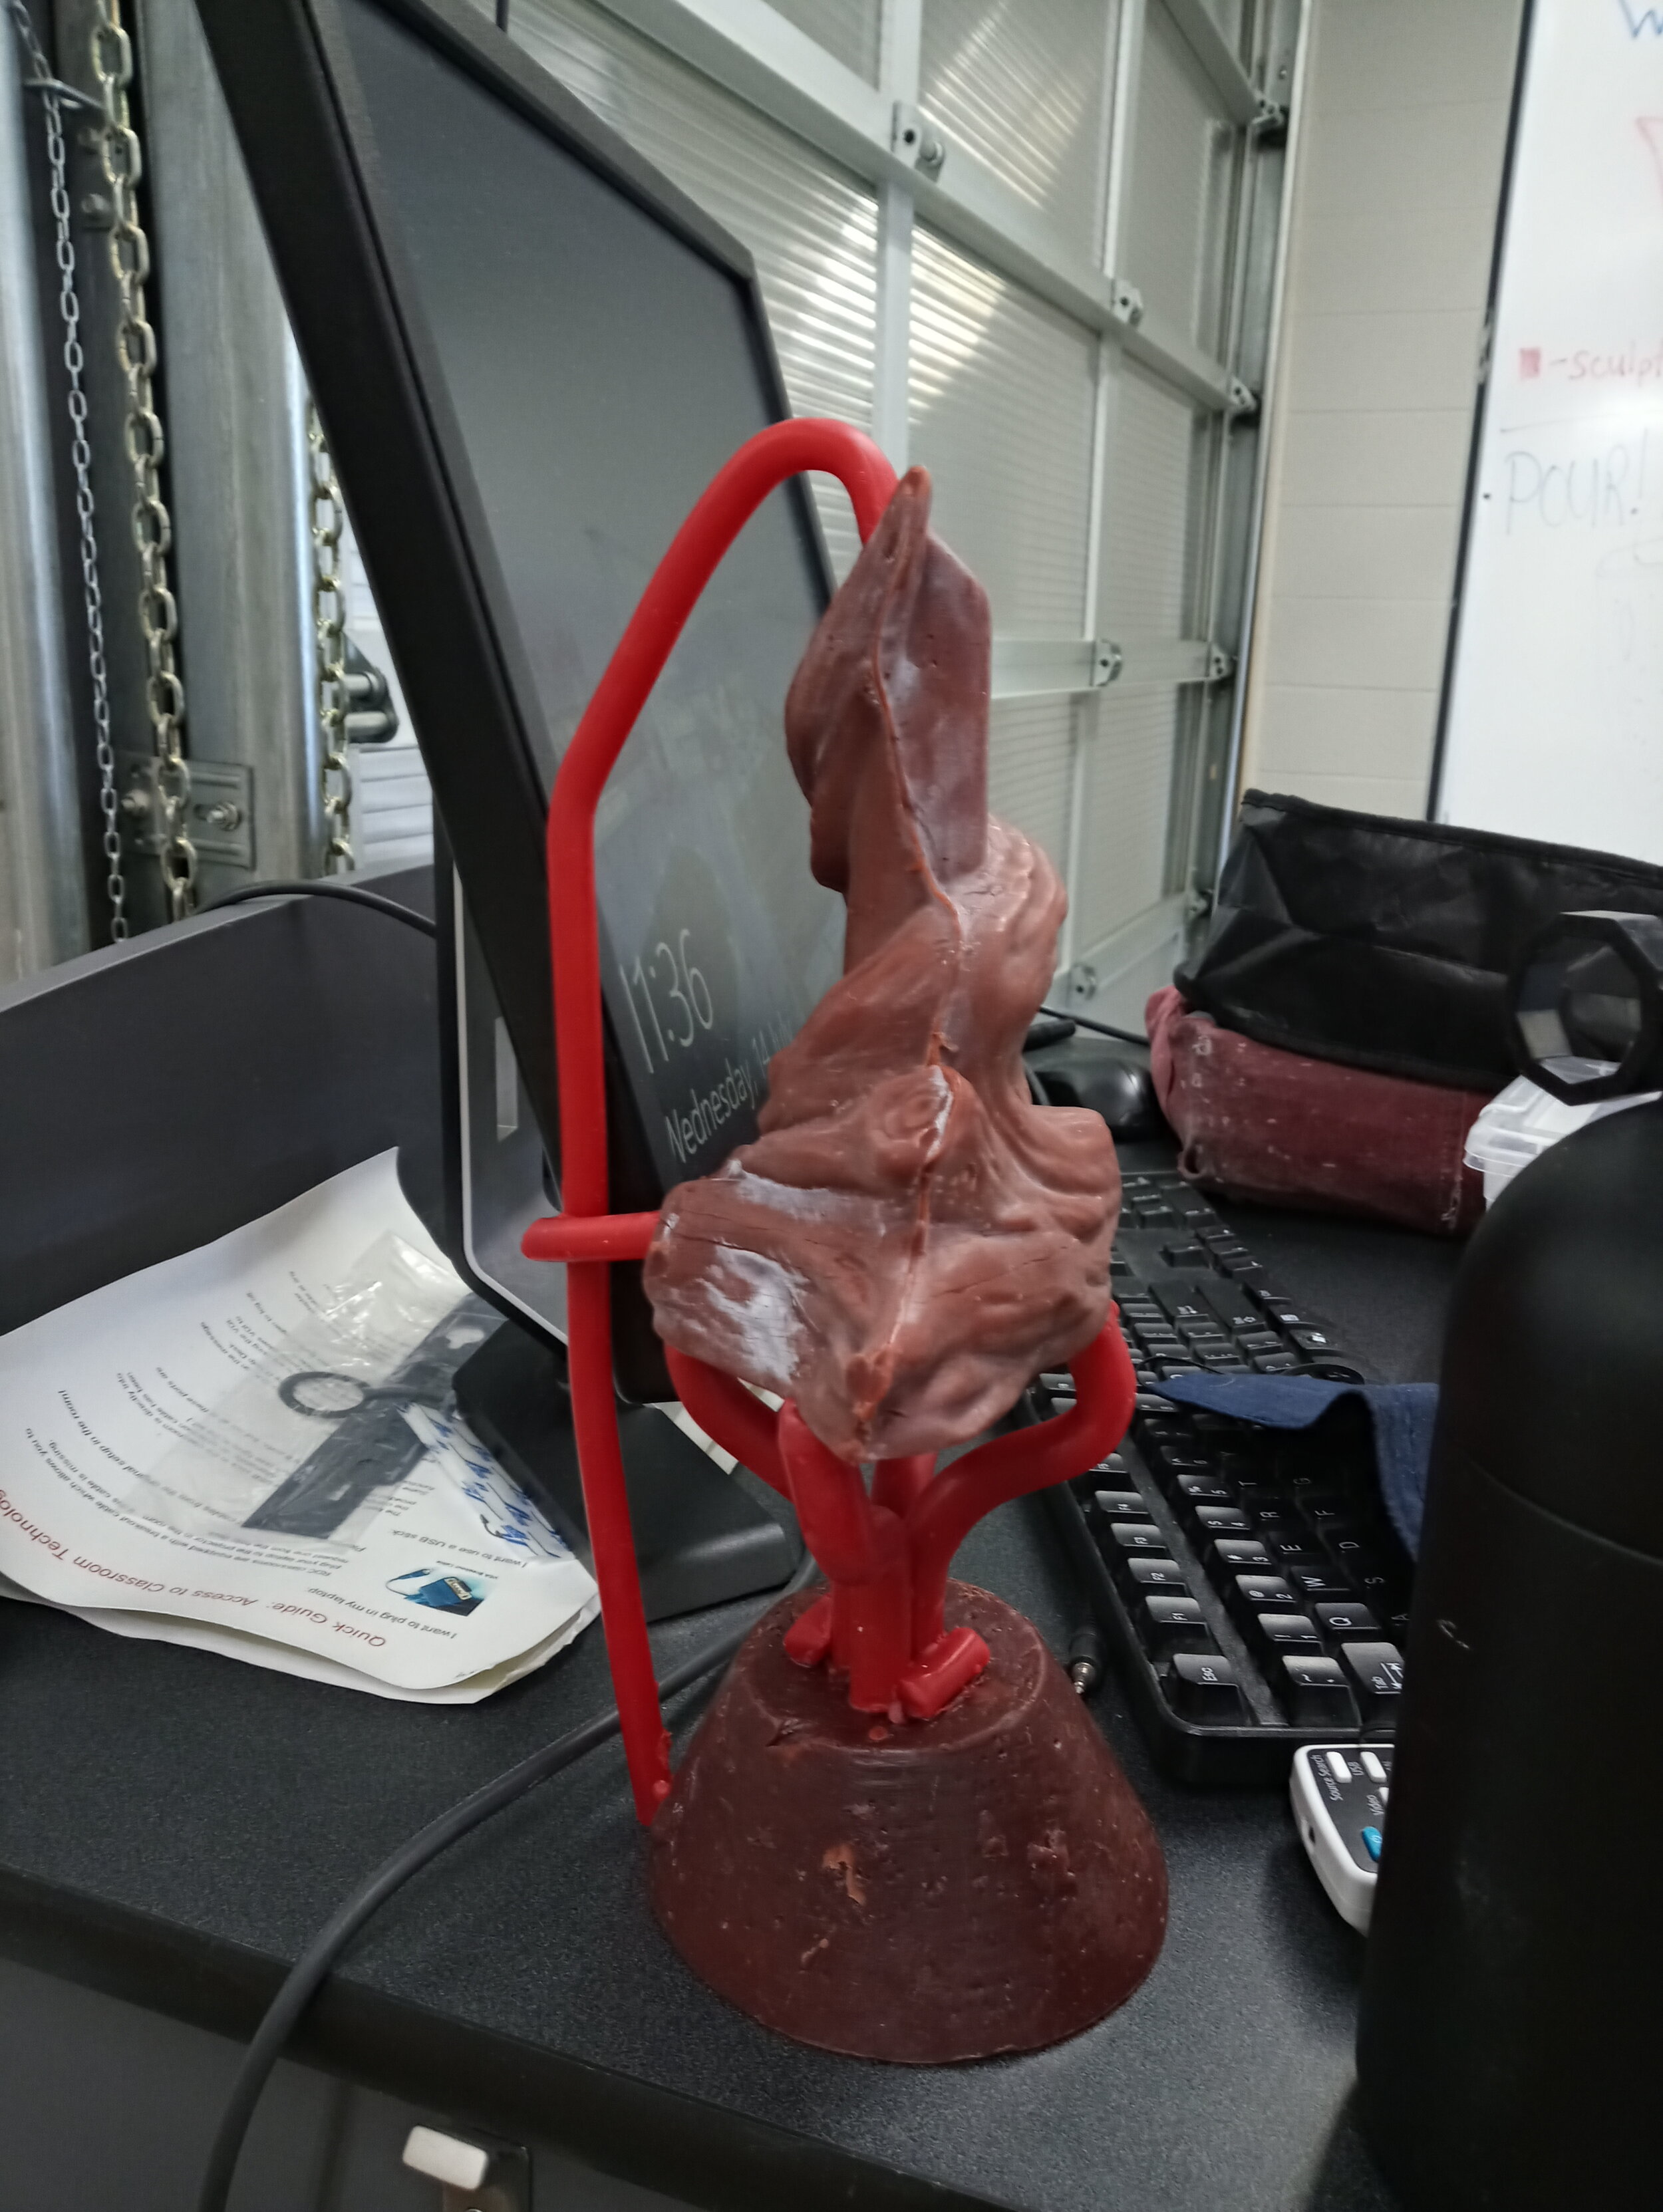
Create a Wax Copy
Next a wax copy is created from the mold. Jeweler’s wax (very hard) is used so the piece is detailed, workable, but durable. The finished piece is hollow with the wax 1/4 to 1/2 inch thick.
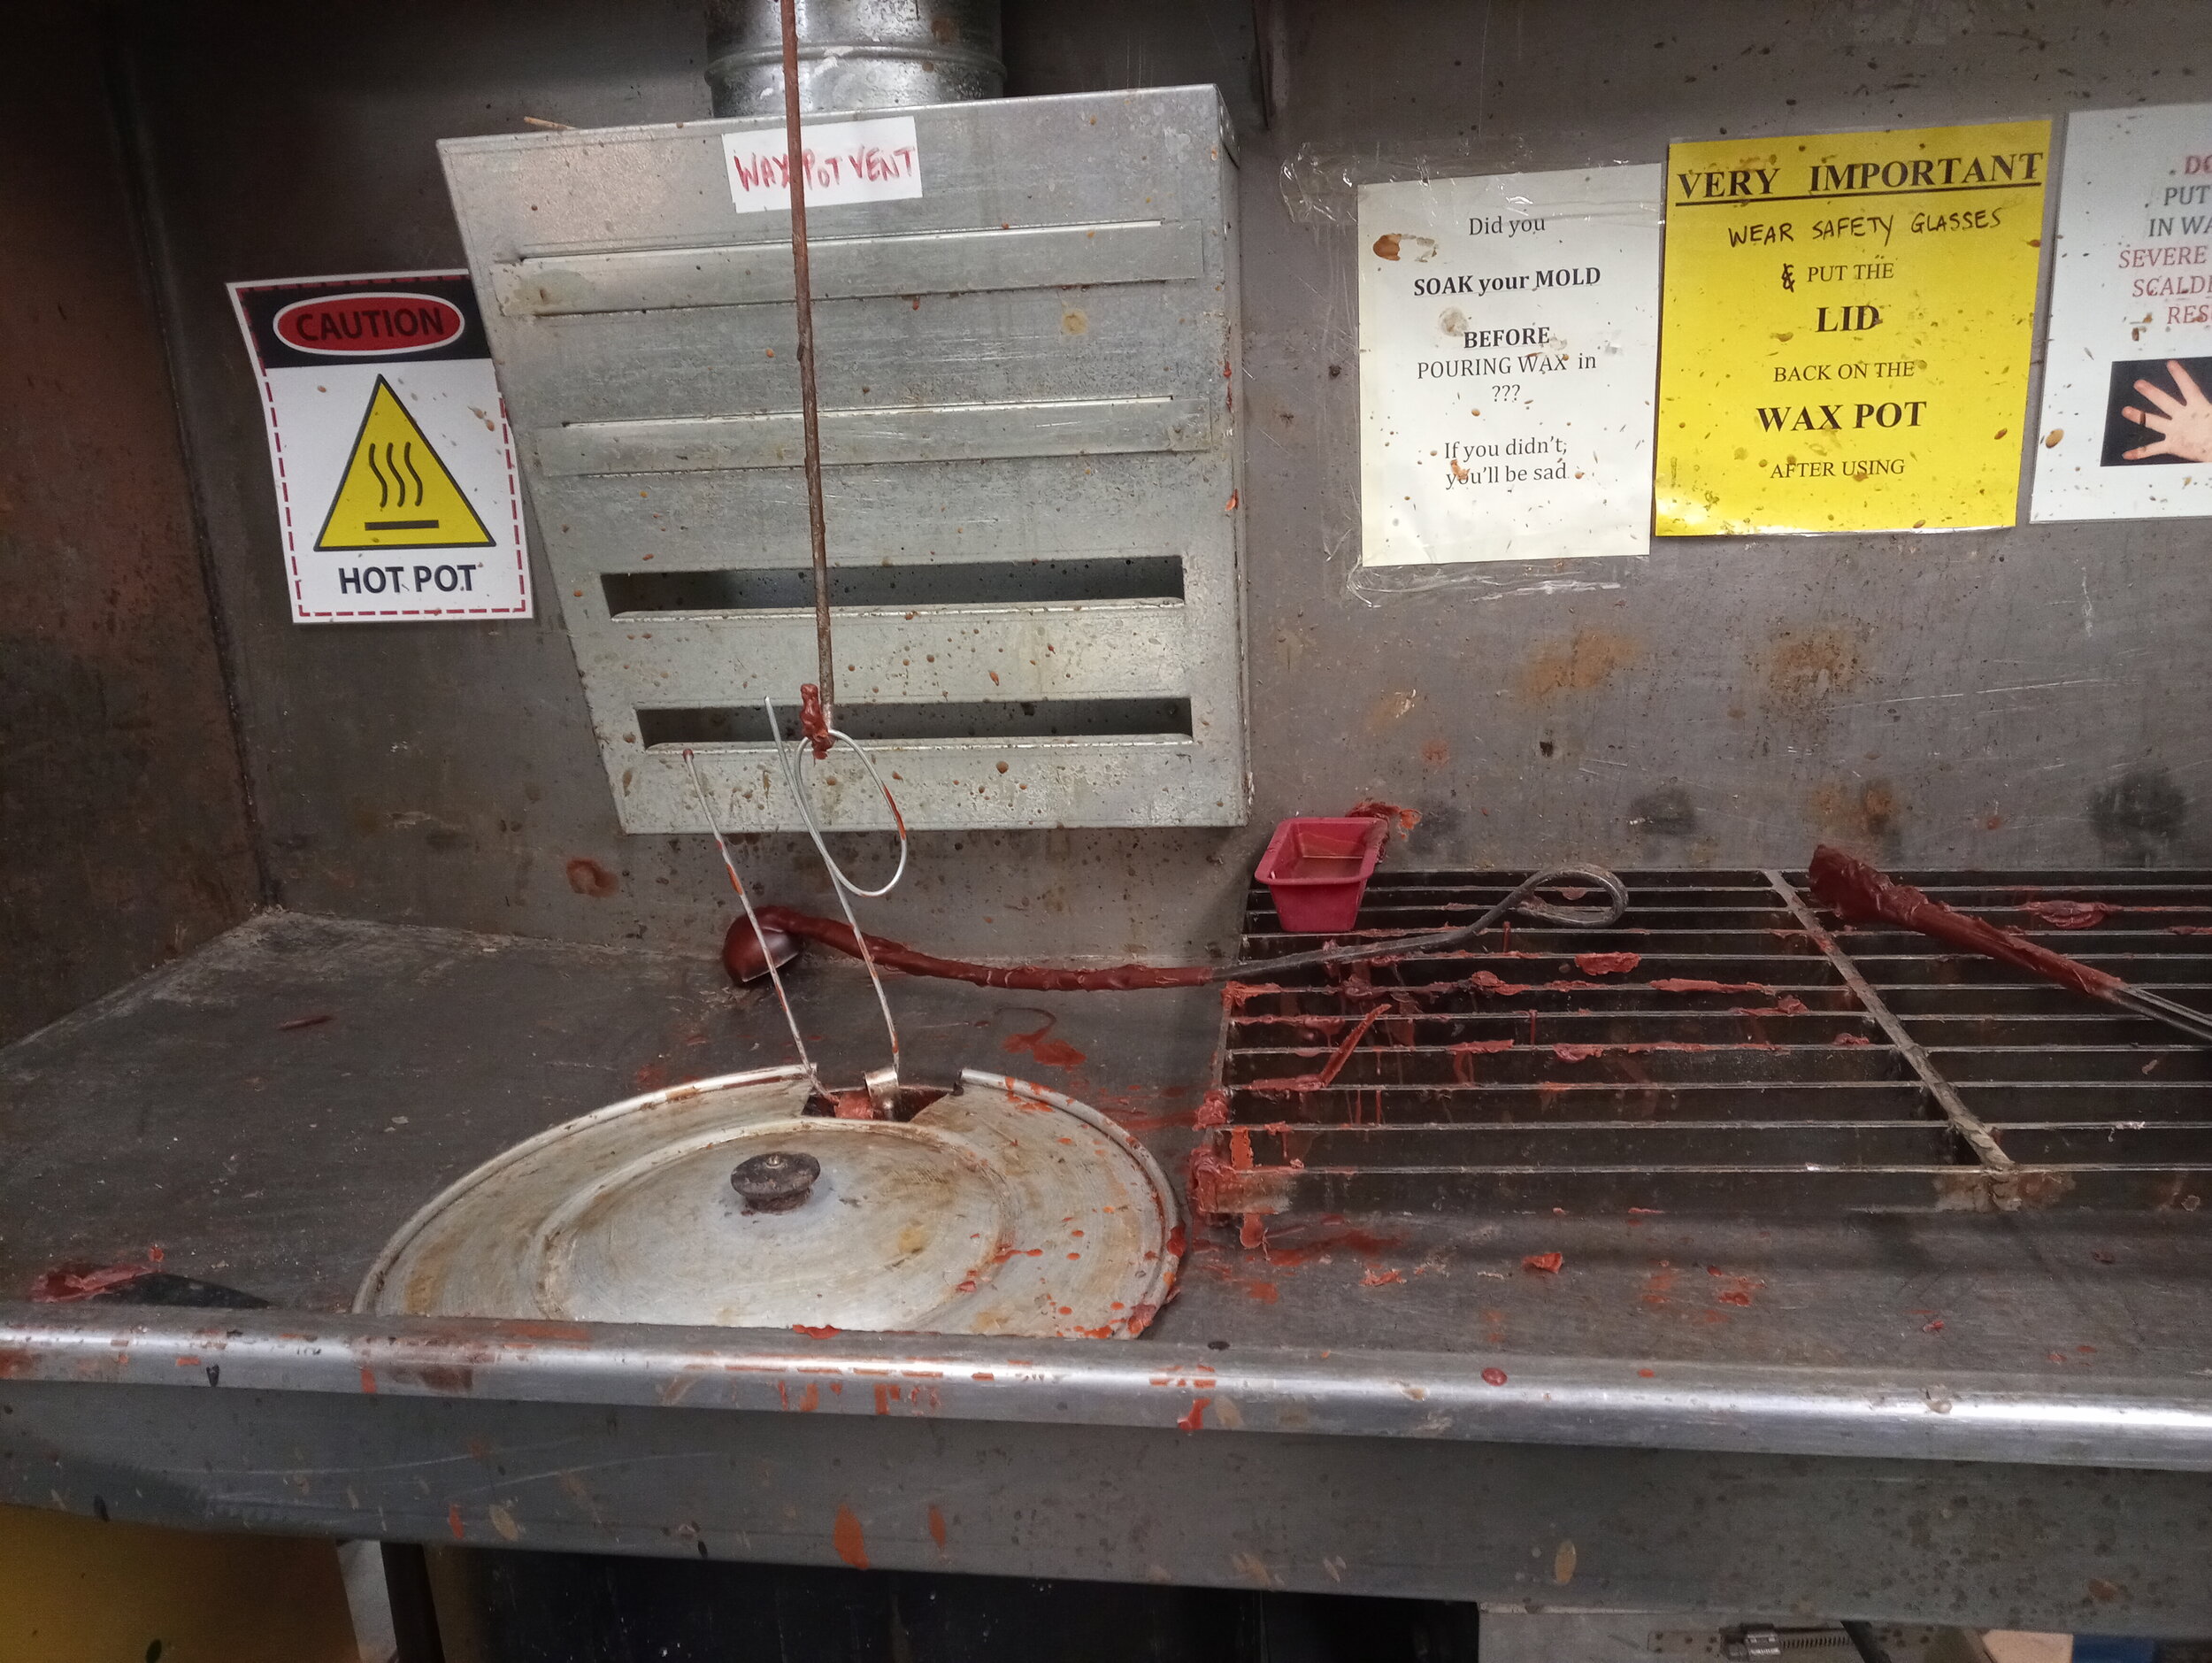

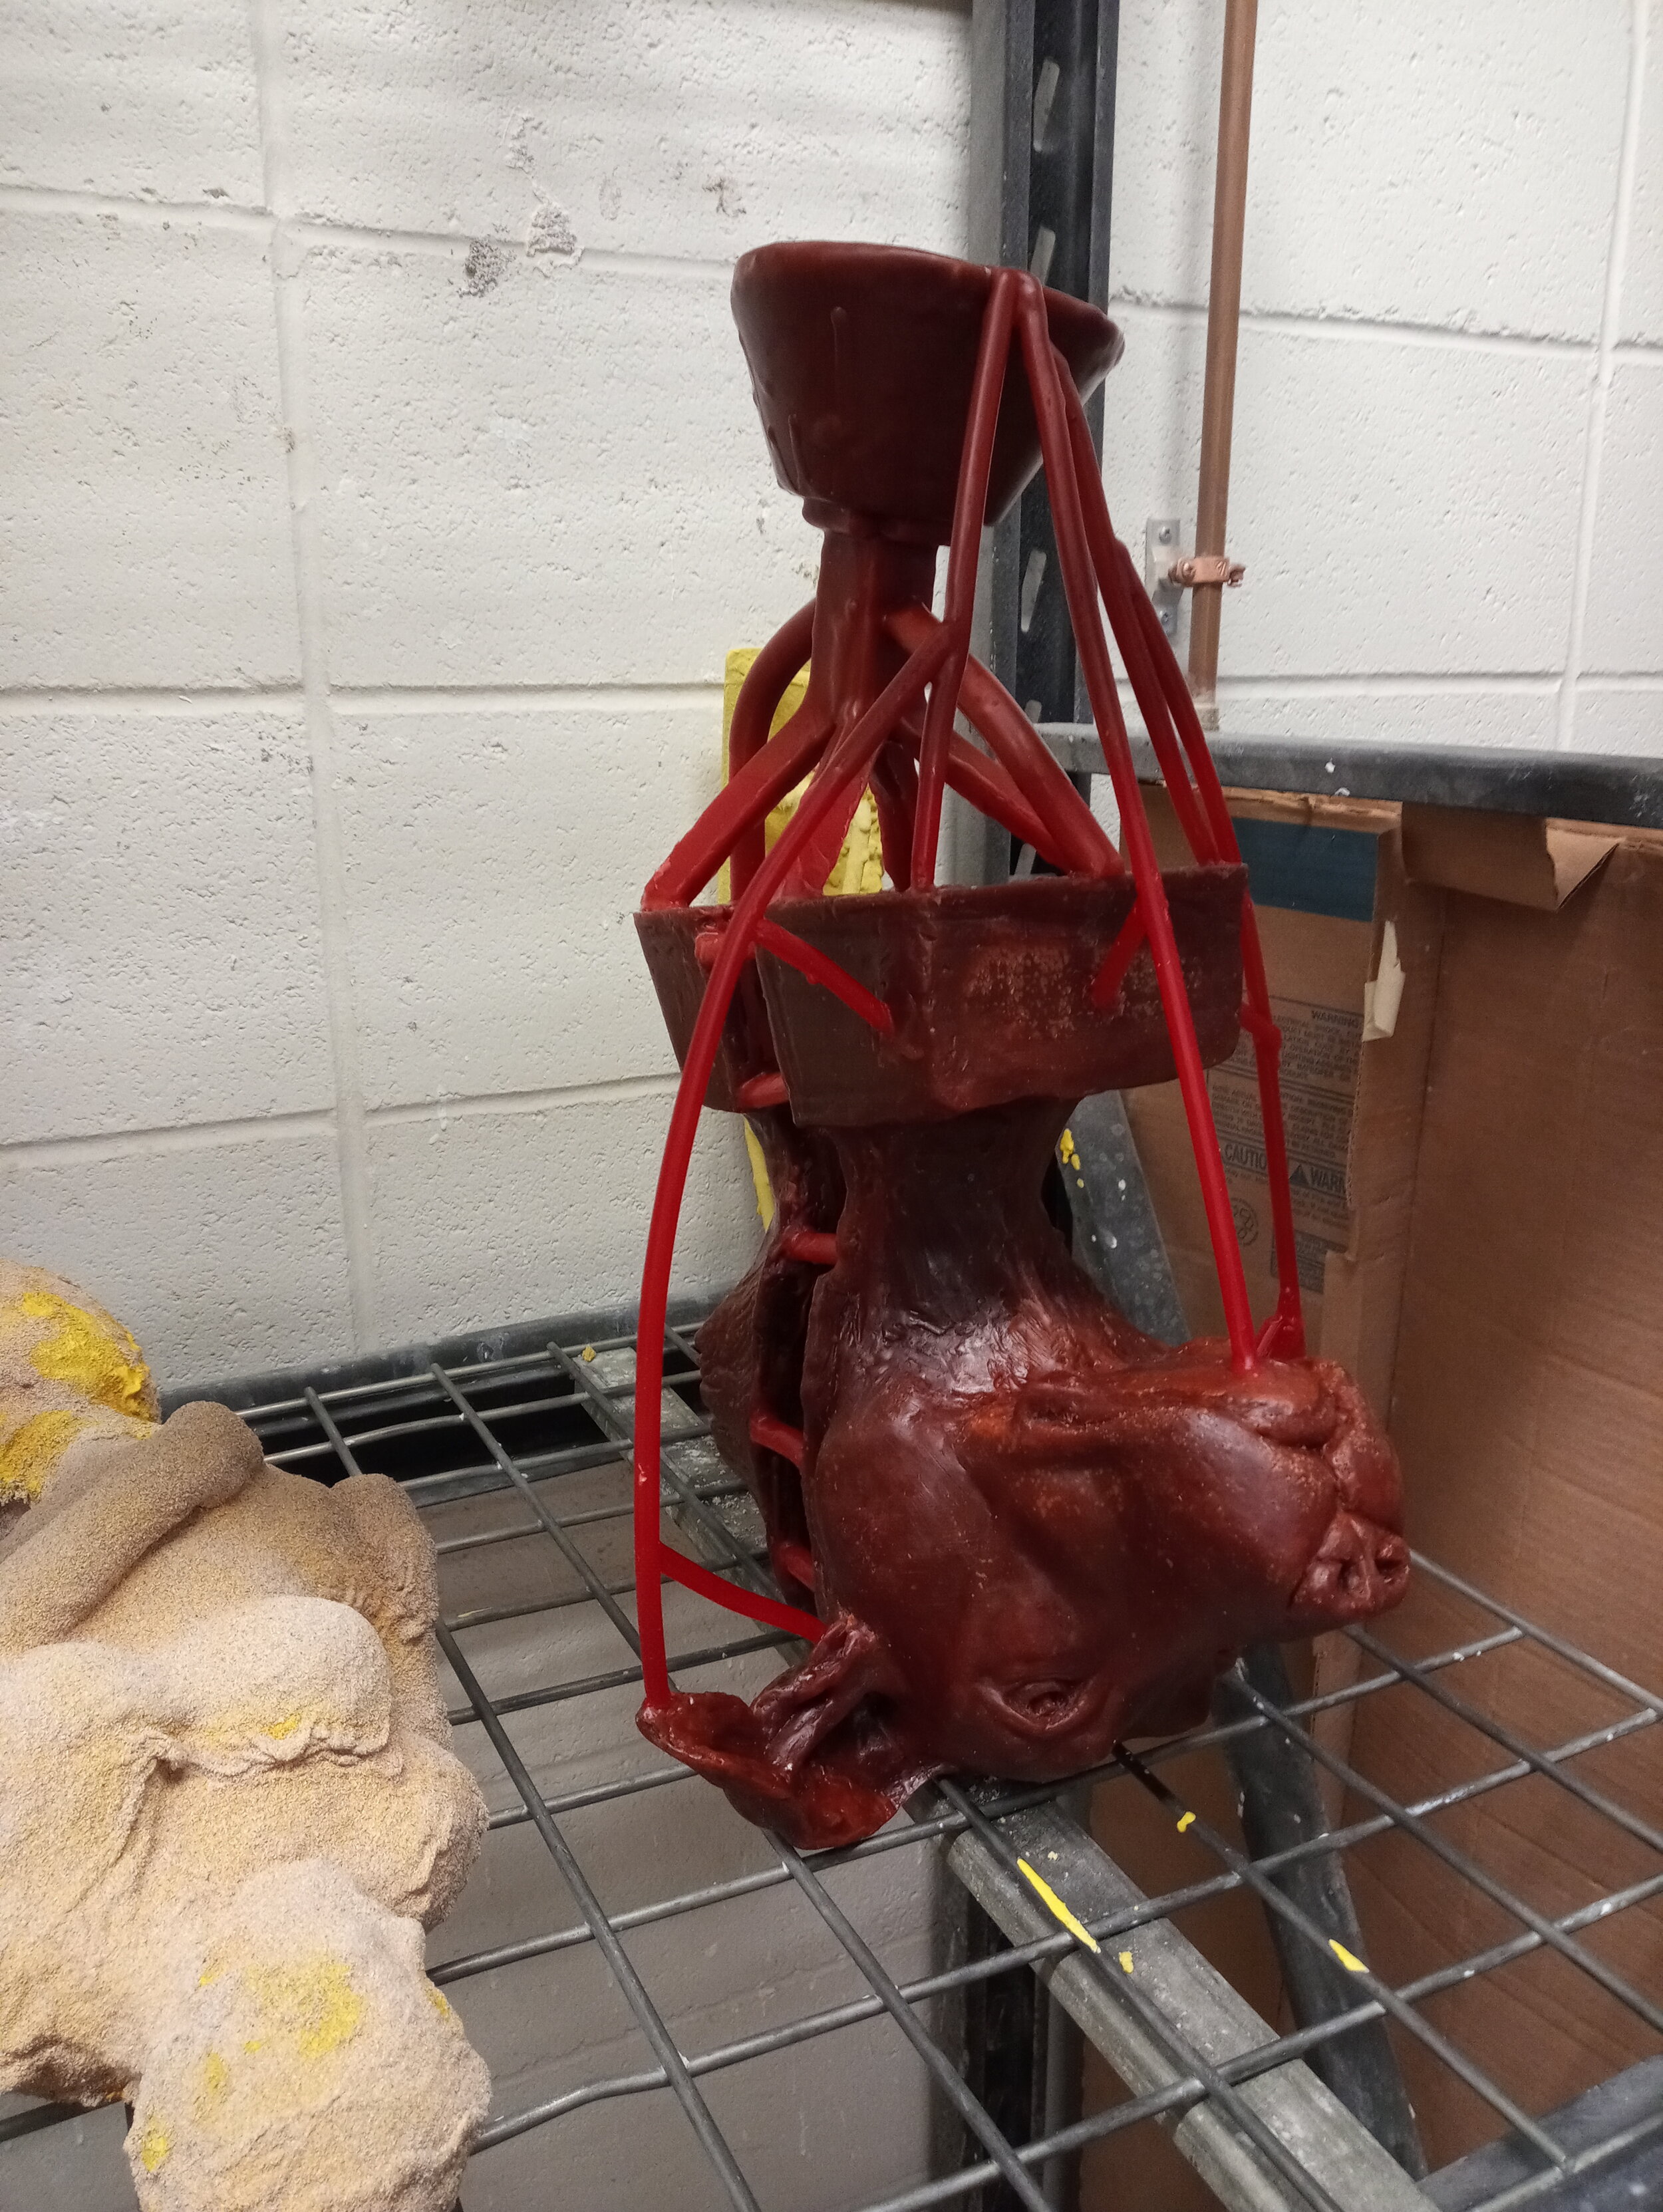
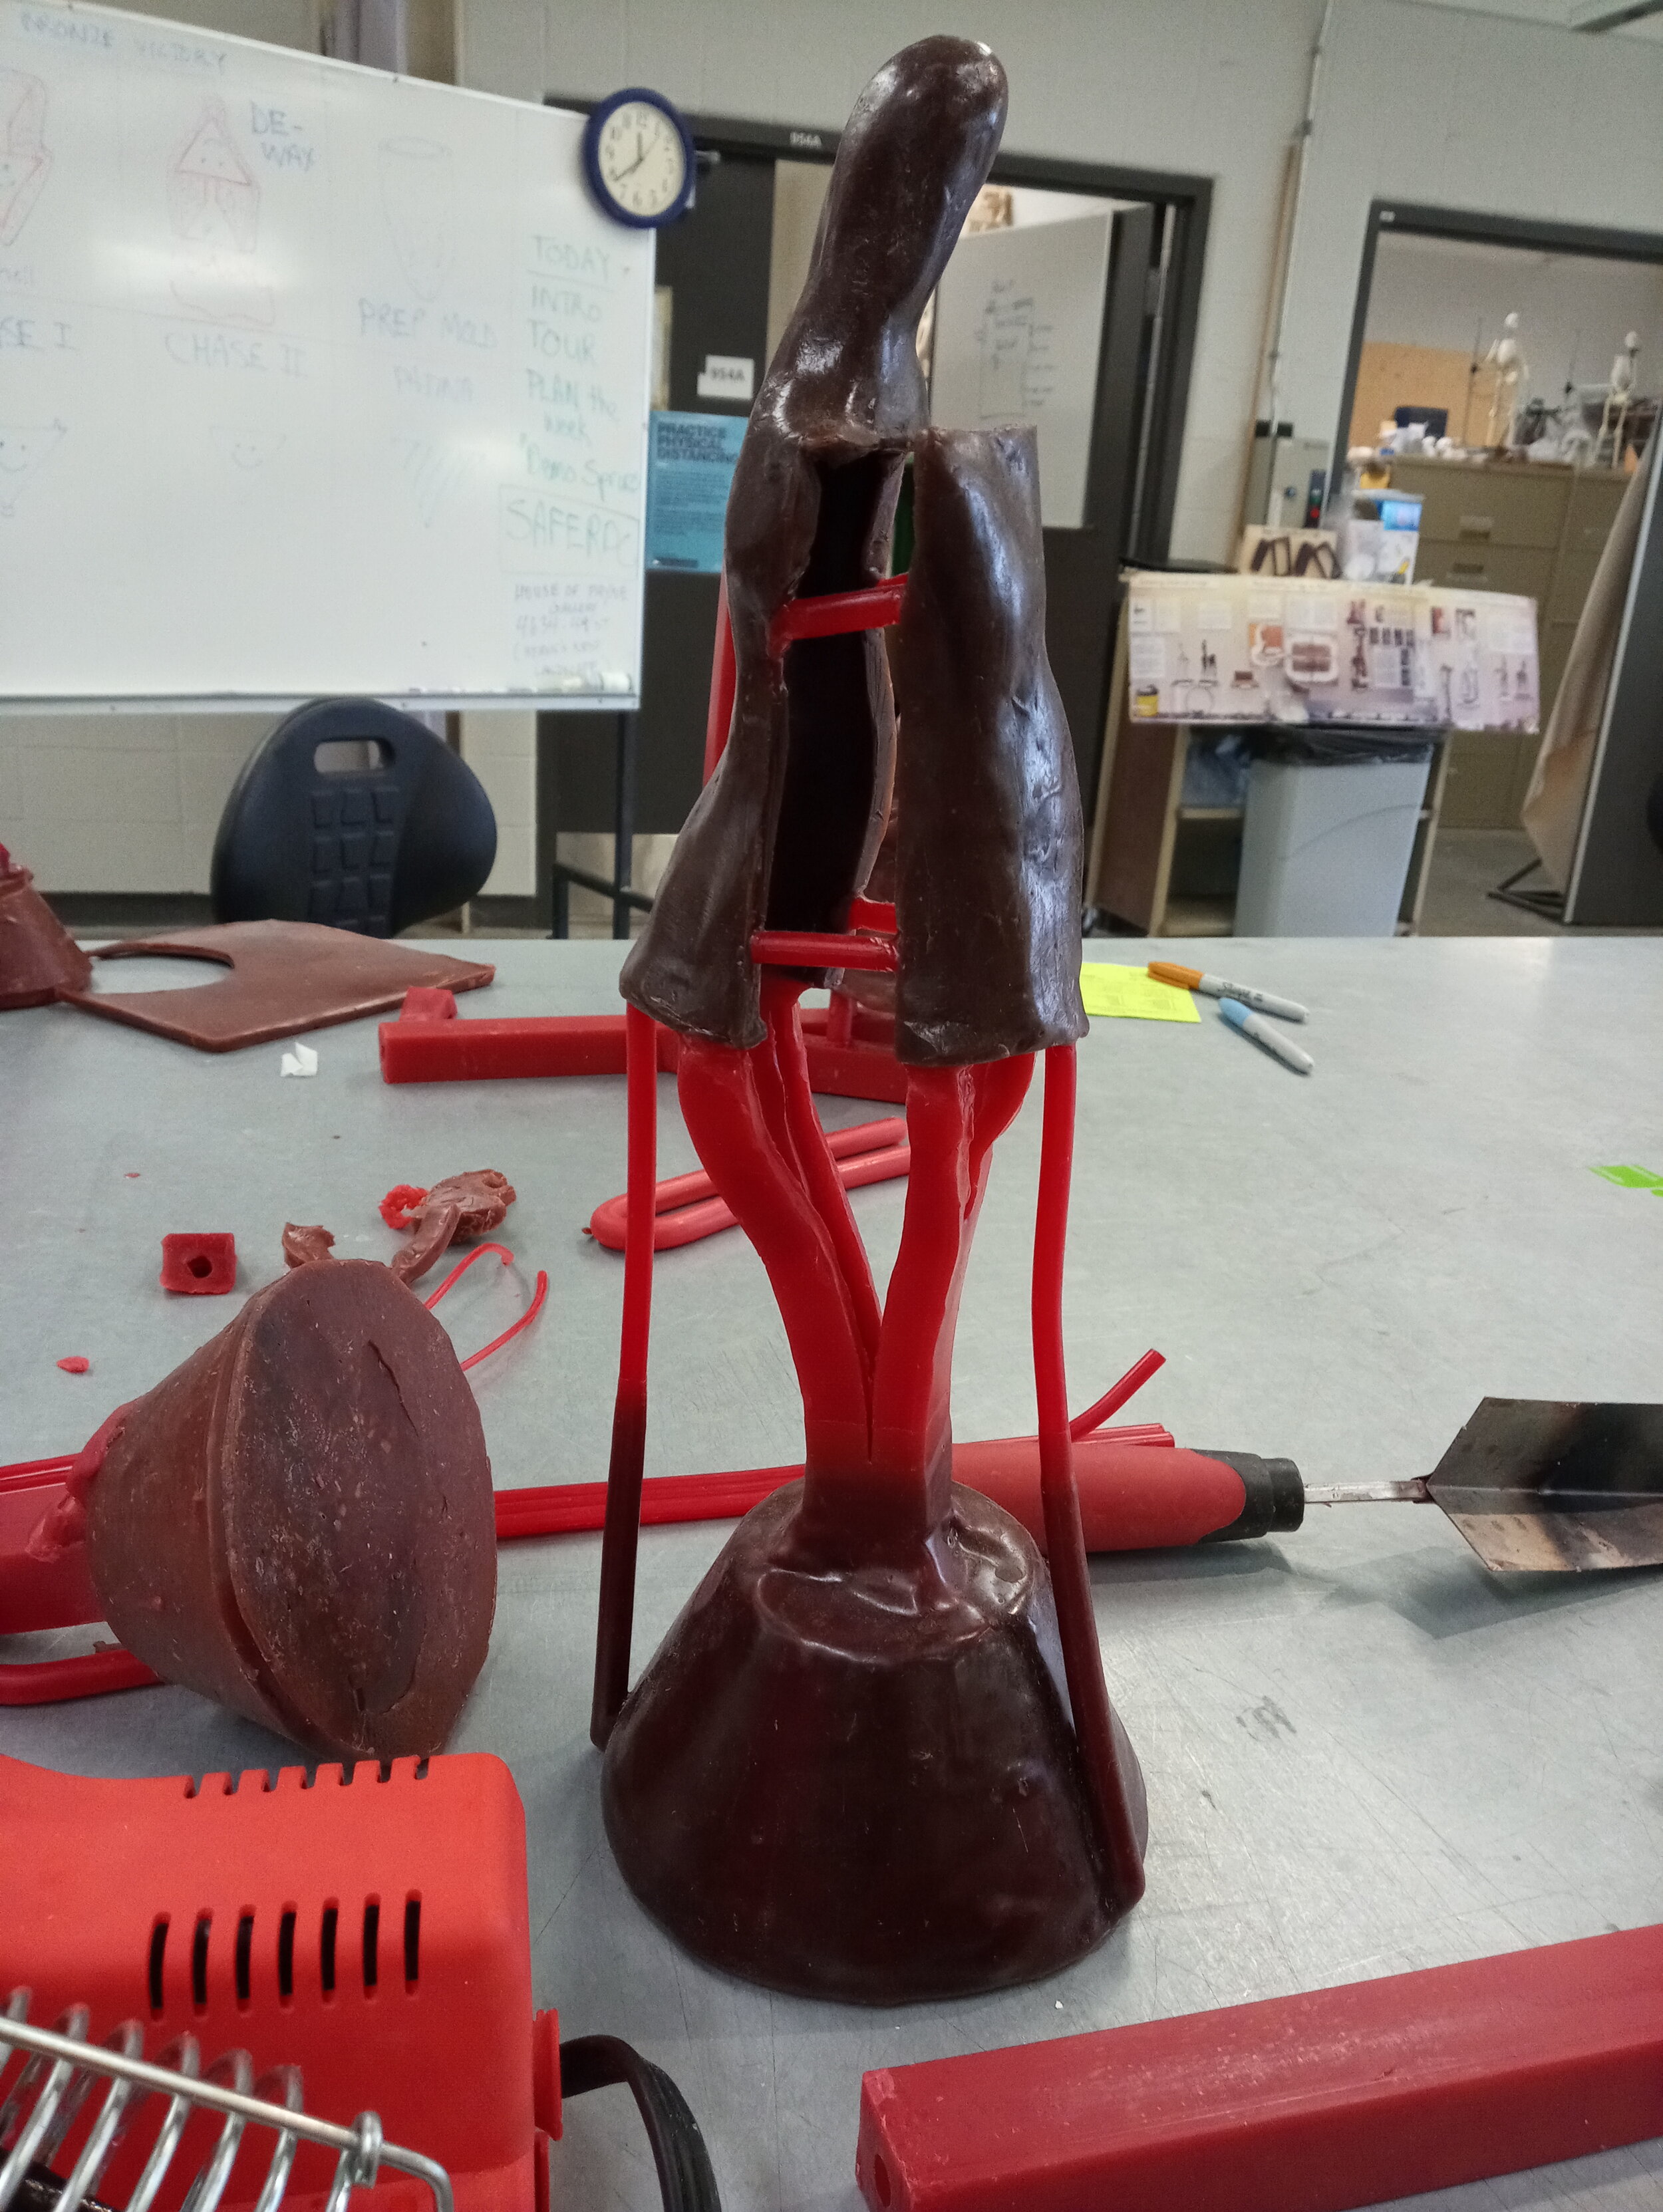
Sprue the Wax piece
Sprue: a channel through which metal or plastic is poured into a mold.
The Sprue has to include a pour point (cup), lines for pouring into the mold, and vents for the air to escape back up. The sprues can be either direct (as shown) or indirect.
The sprue system is in wax also, and is time consuming and an art unto itself. It may also include cutting the sculpture into “segments”.

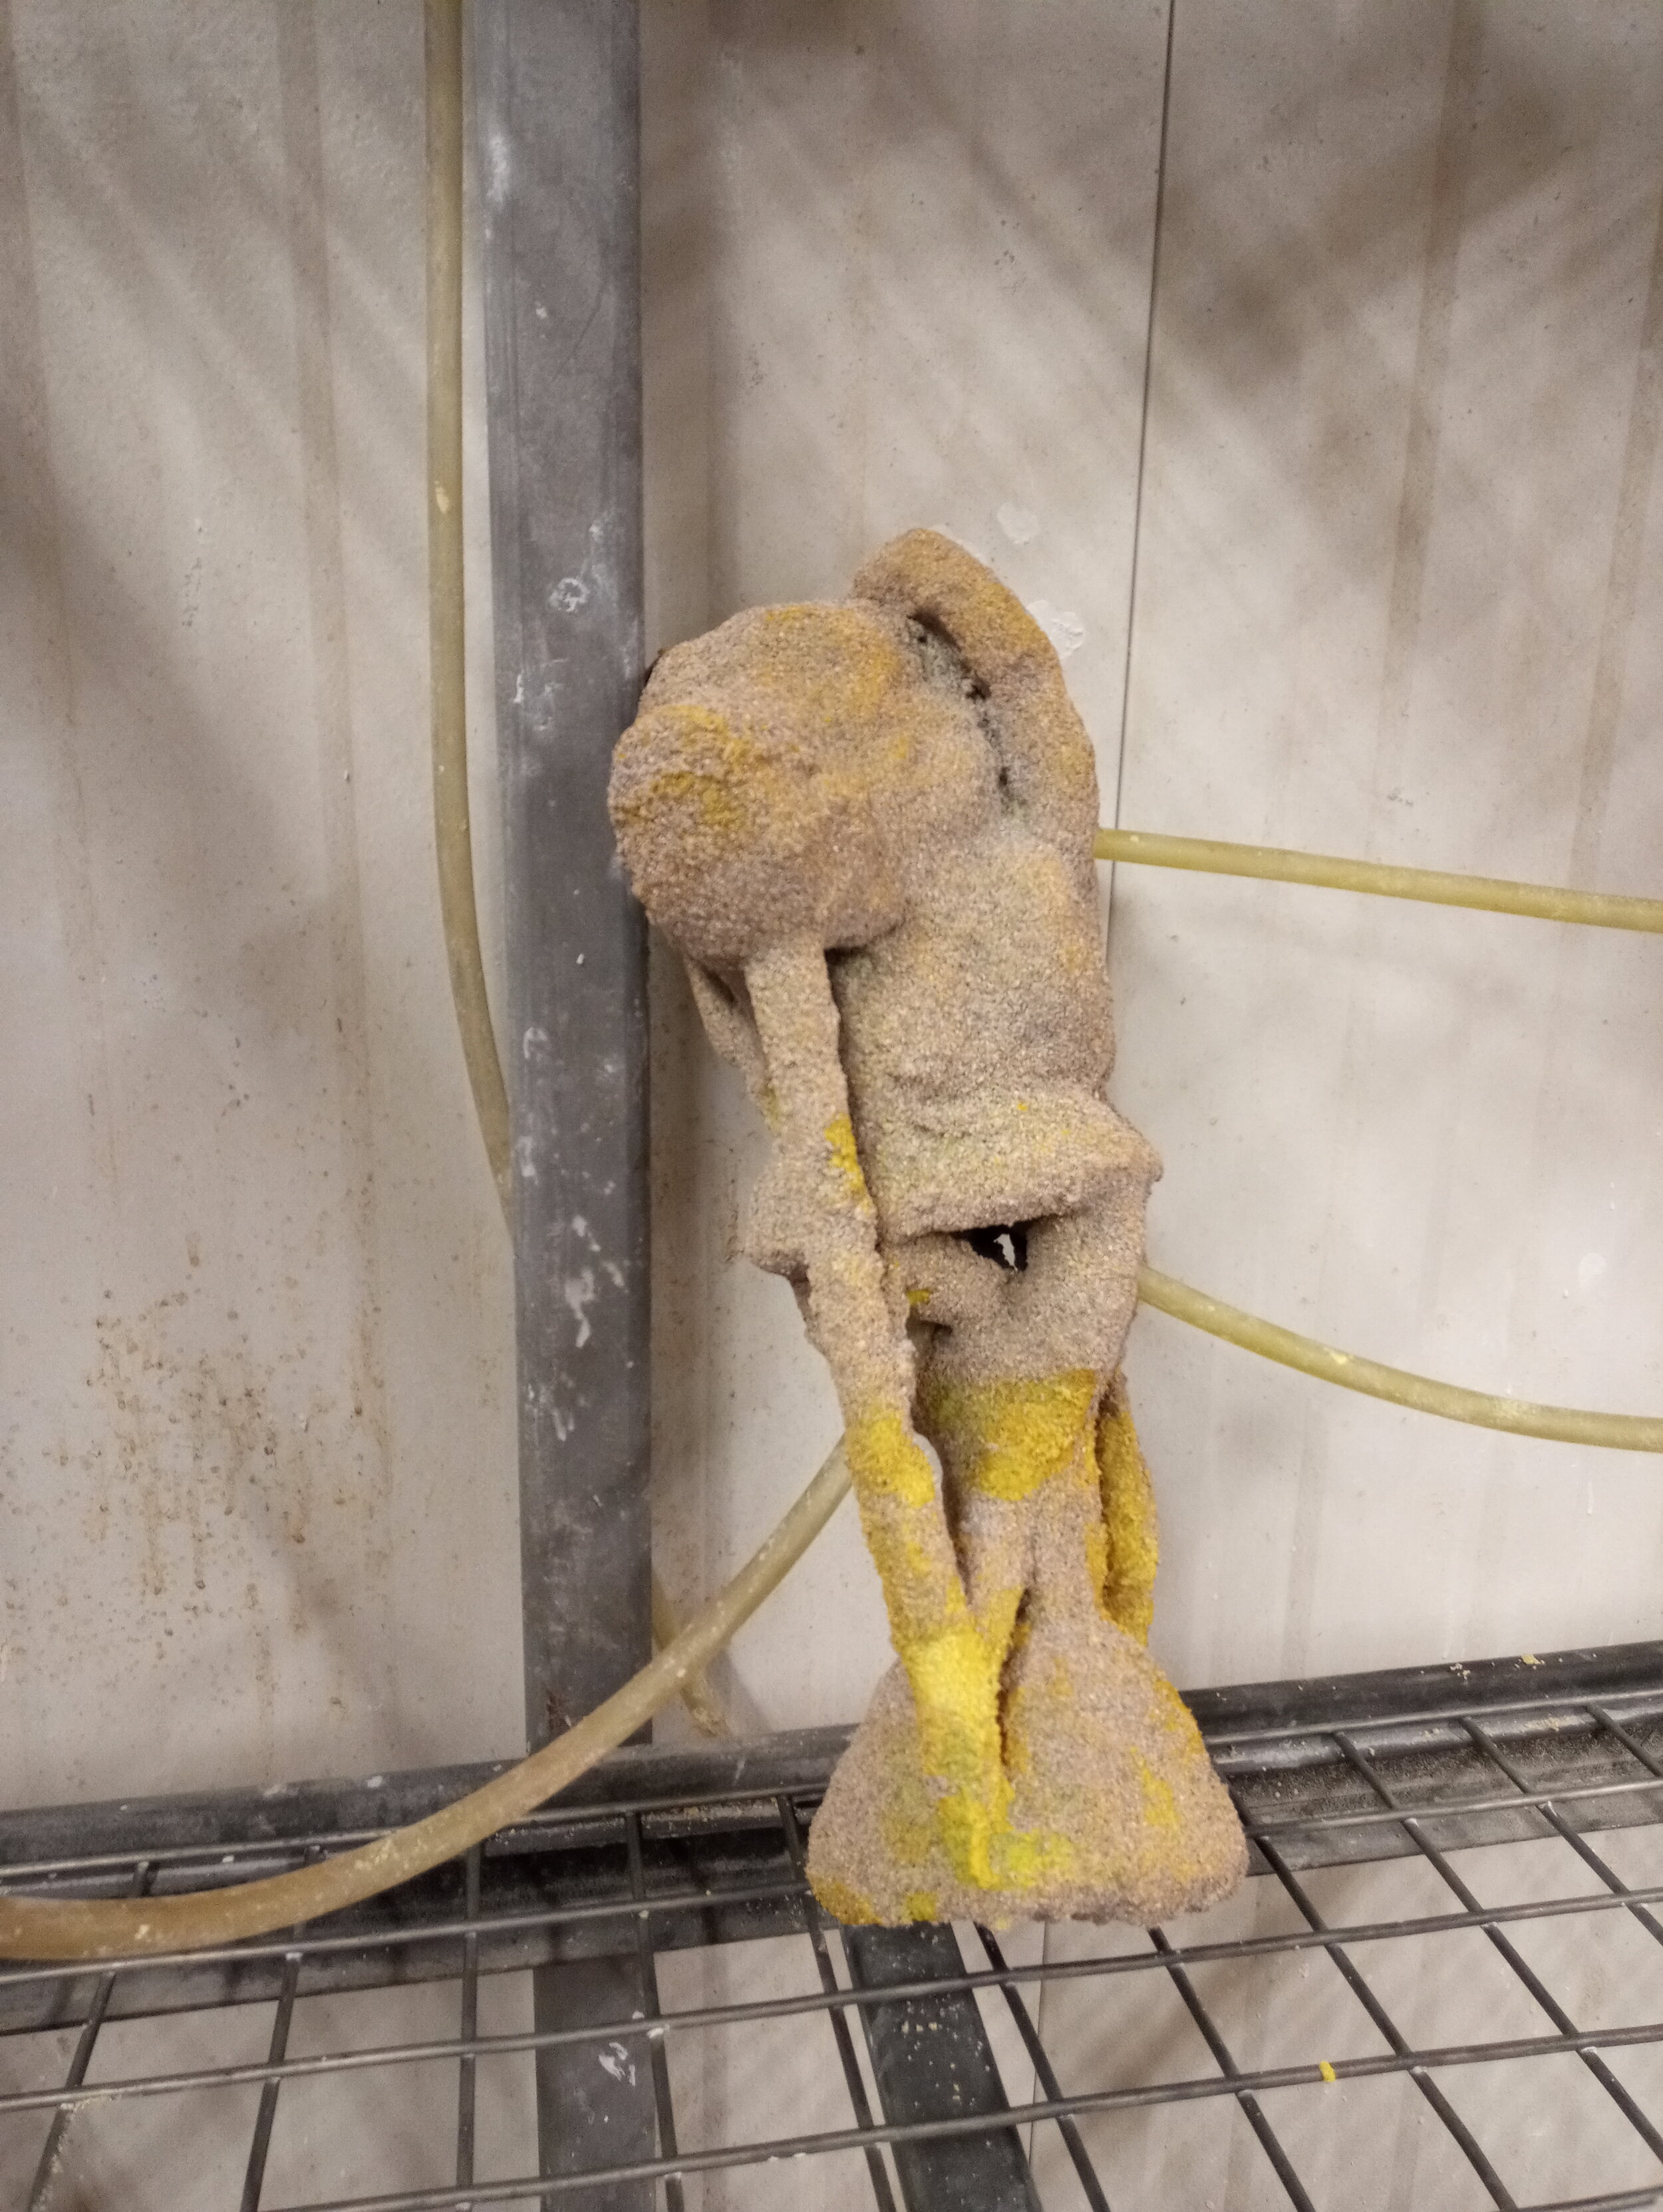
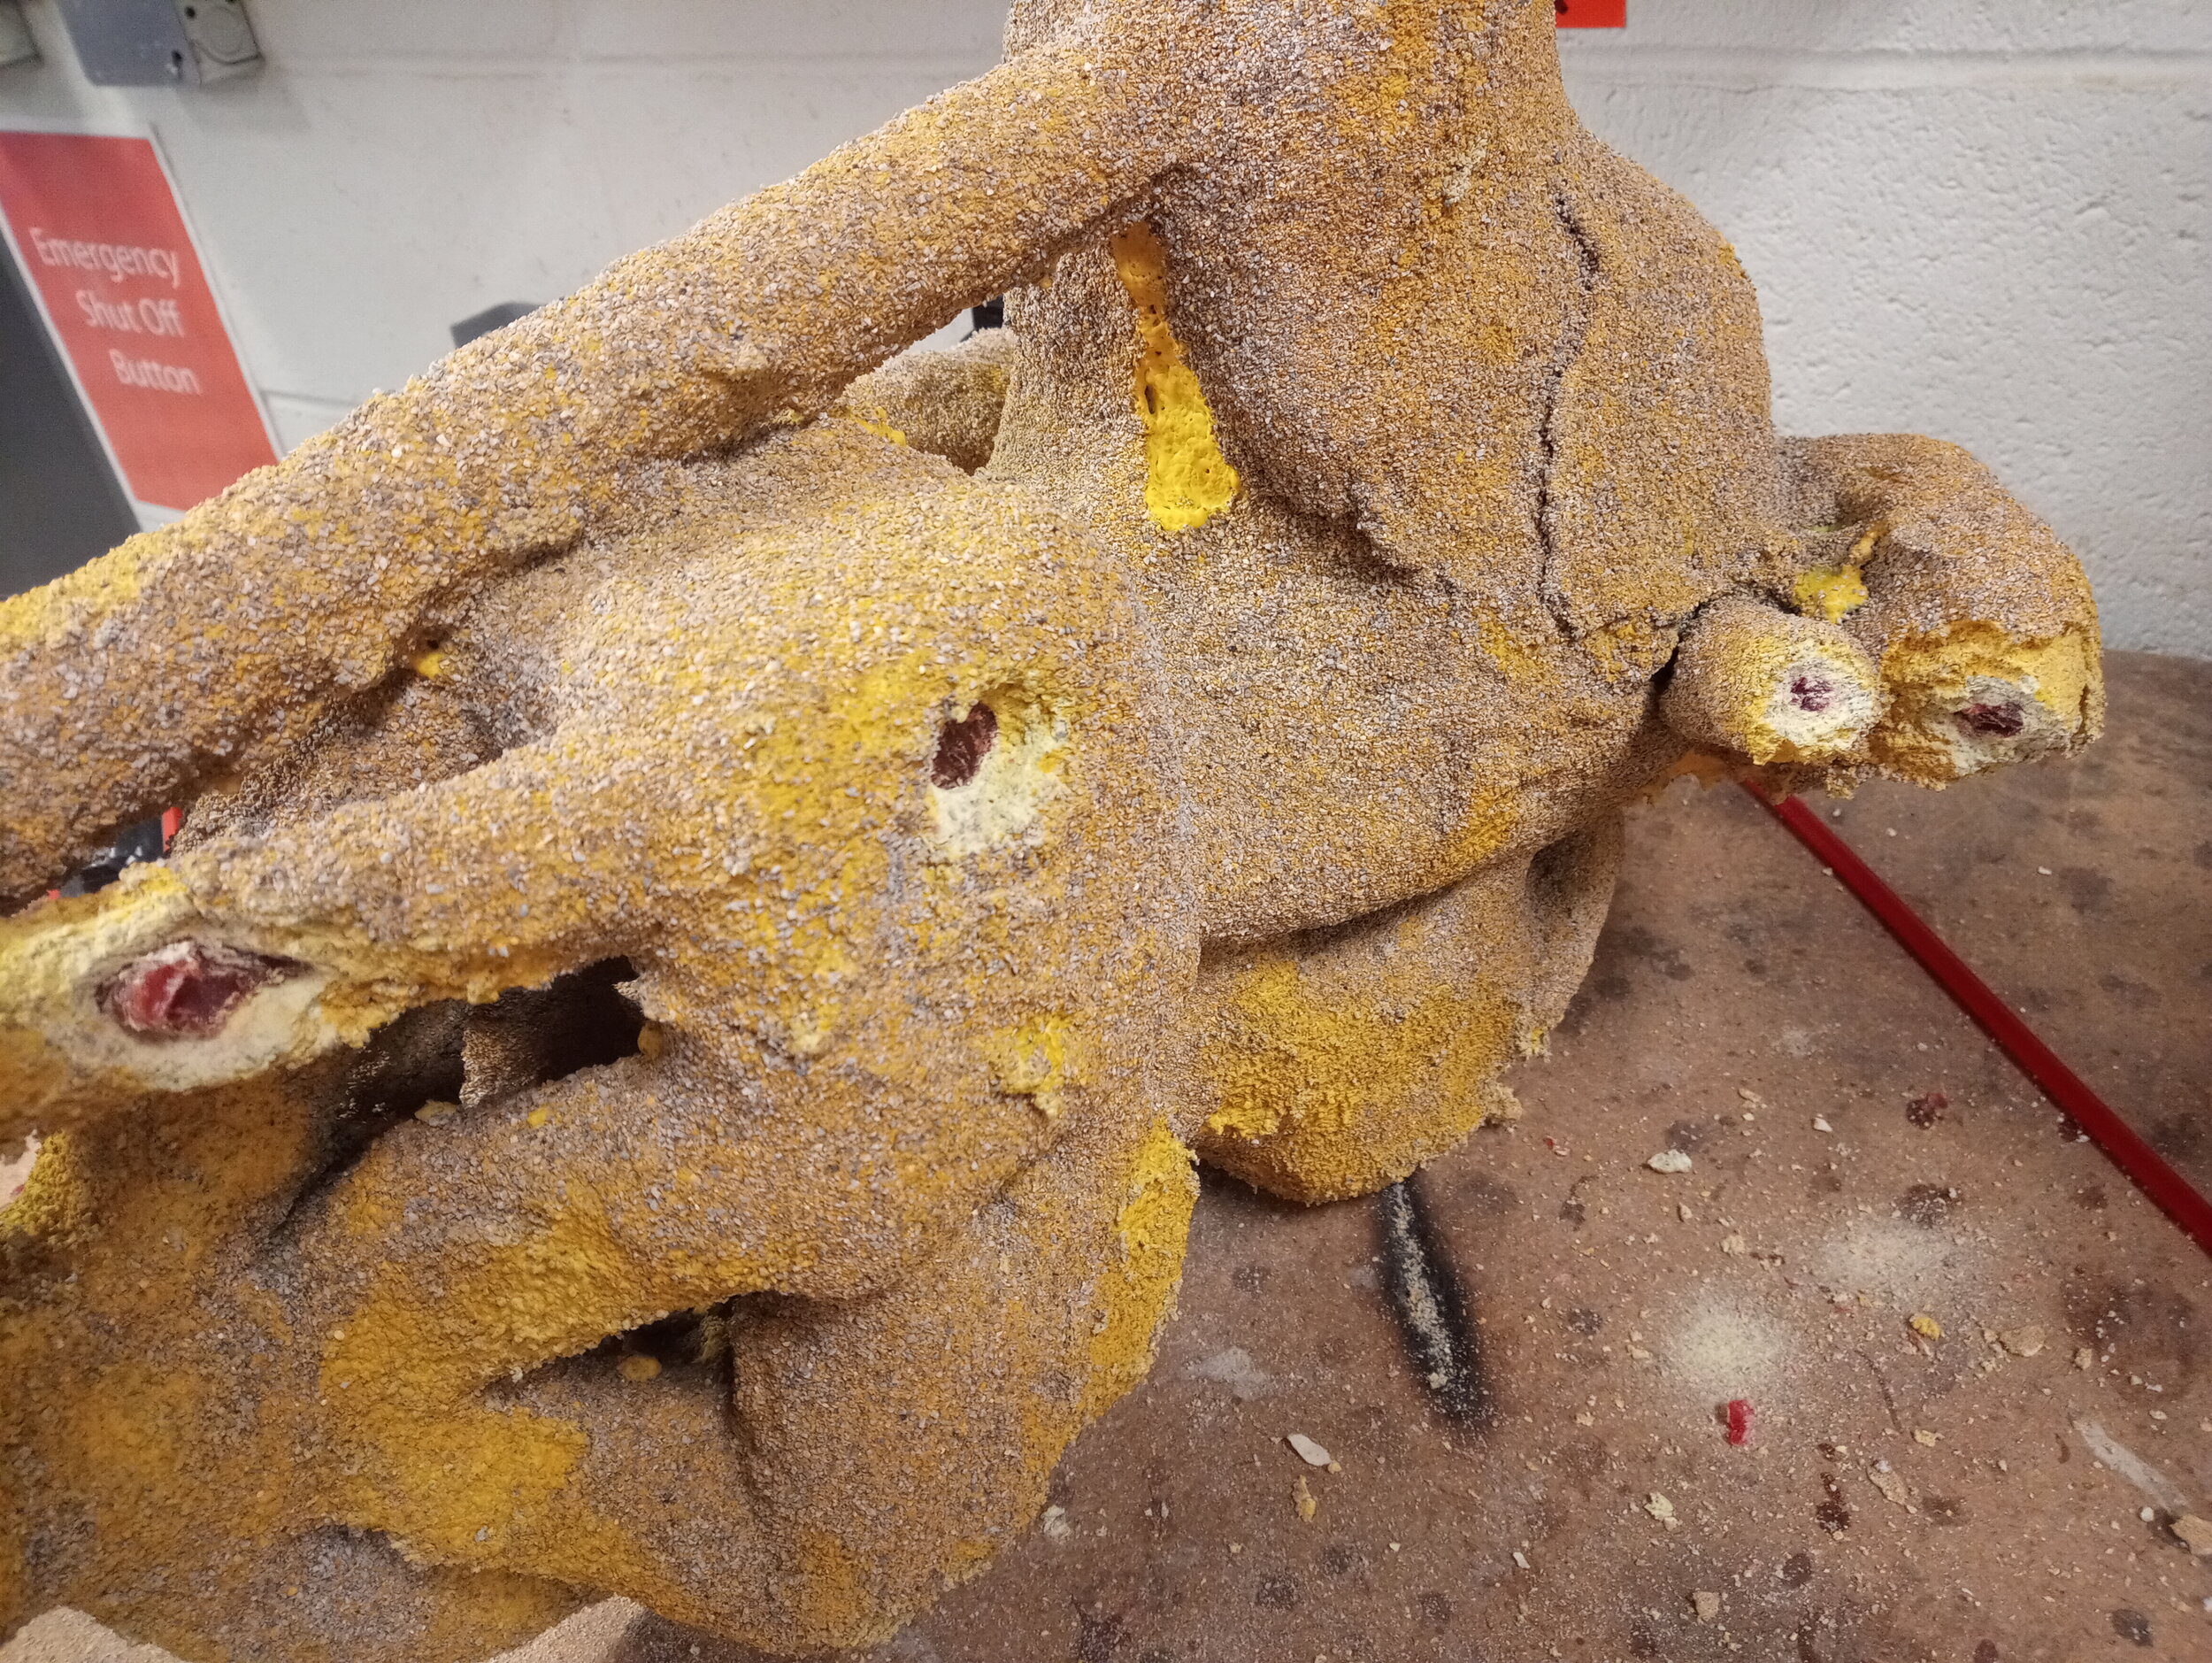
Coating the Wax, Creating a ceramic mold
The wax is then coated in several layers of slurry and sand to create a ceramic “shell” or mold.
If a vent breaks while applying the layers of coating, a repair is needed to the wax lines. This piece has 10 layers and took 1 1/2 to 2 hours drying time between layers. Weighed in excess of 60 lbs. when done adding all the layers of slurry and sand.


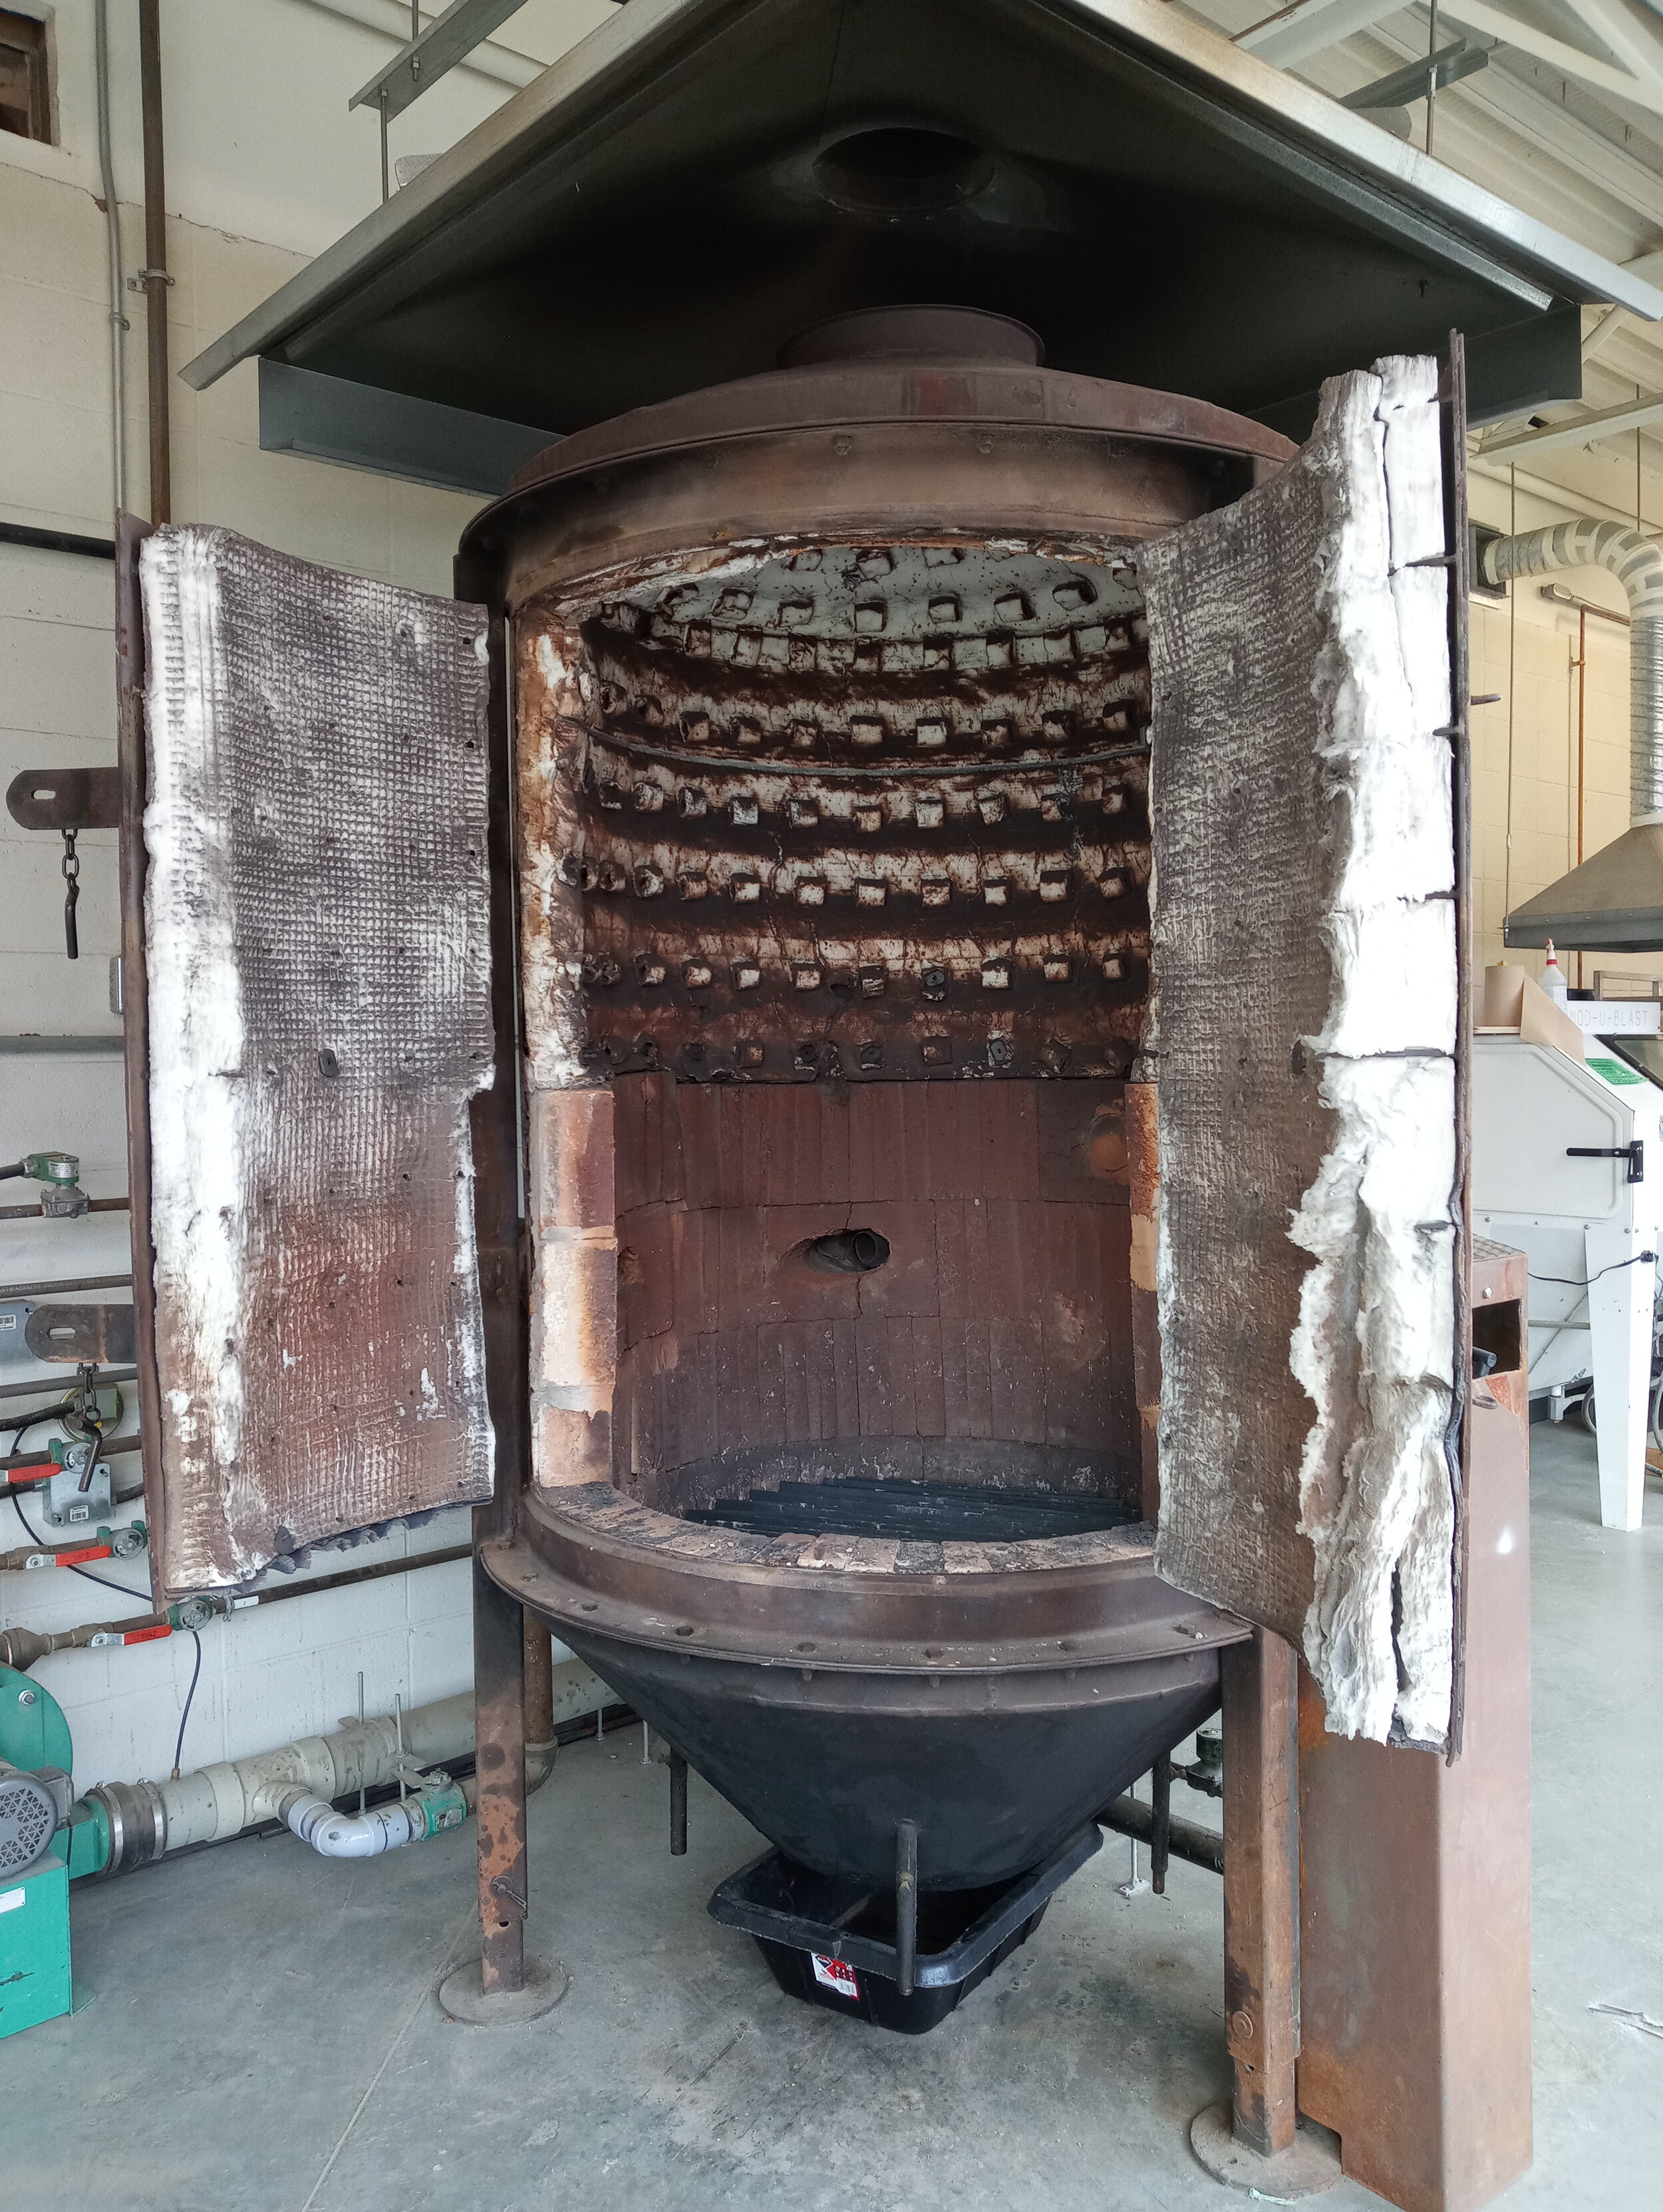
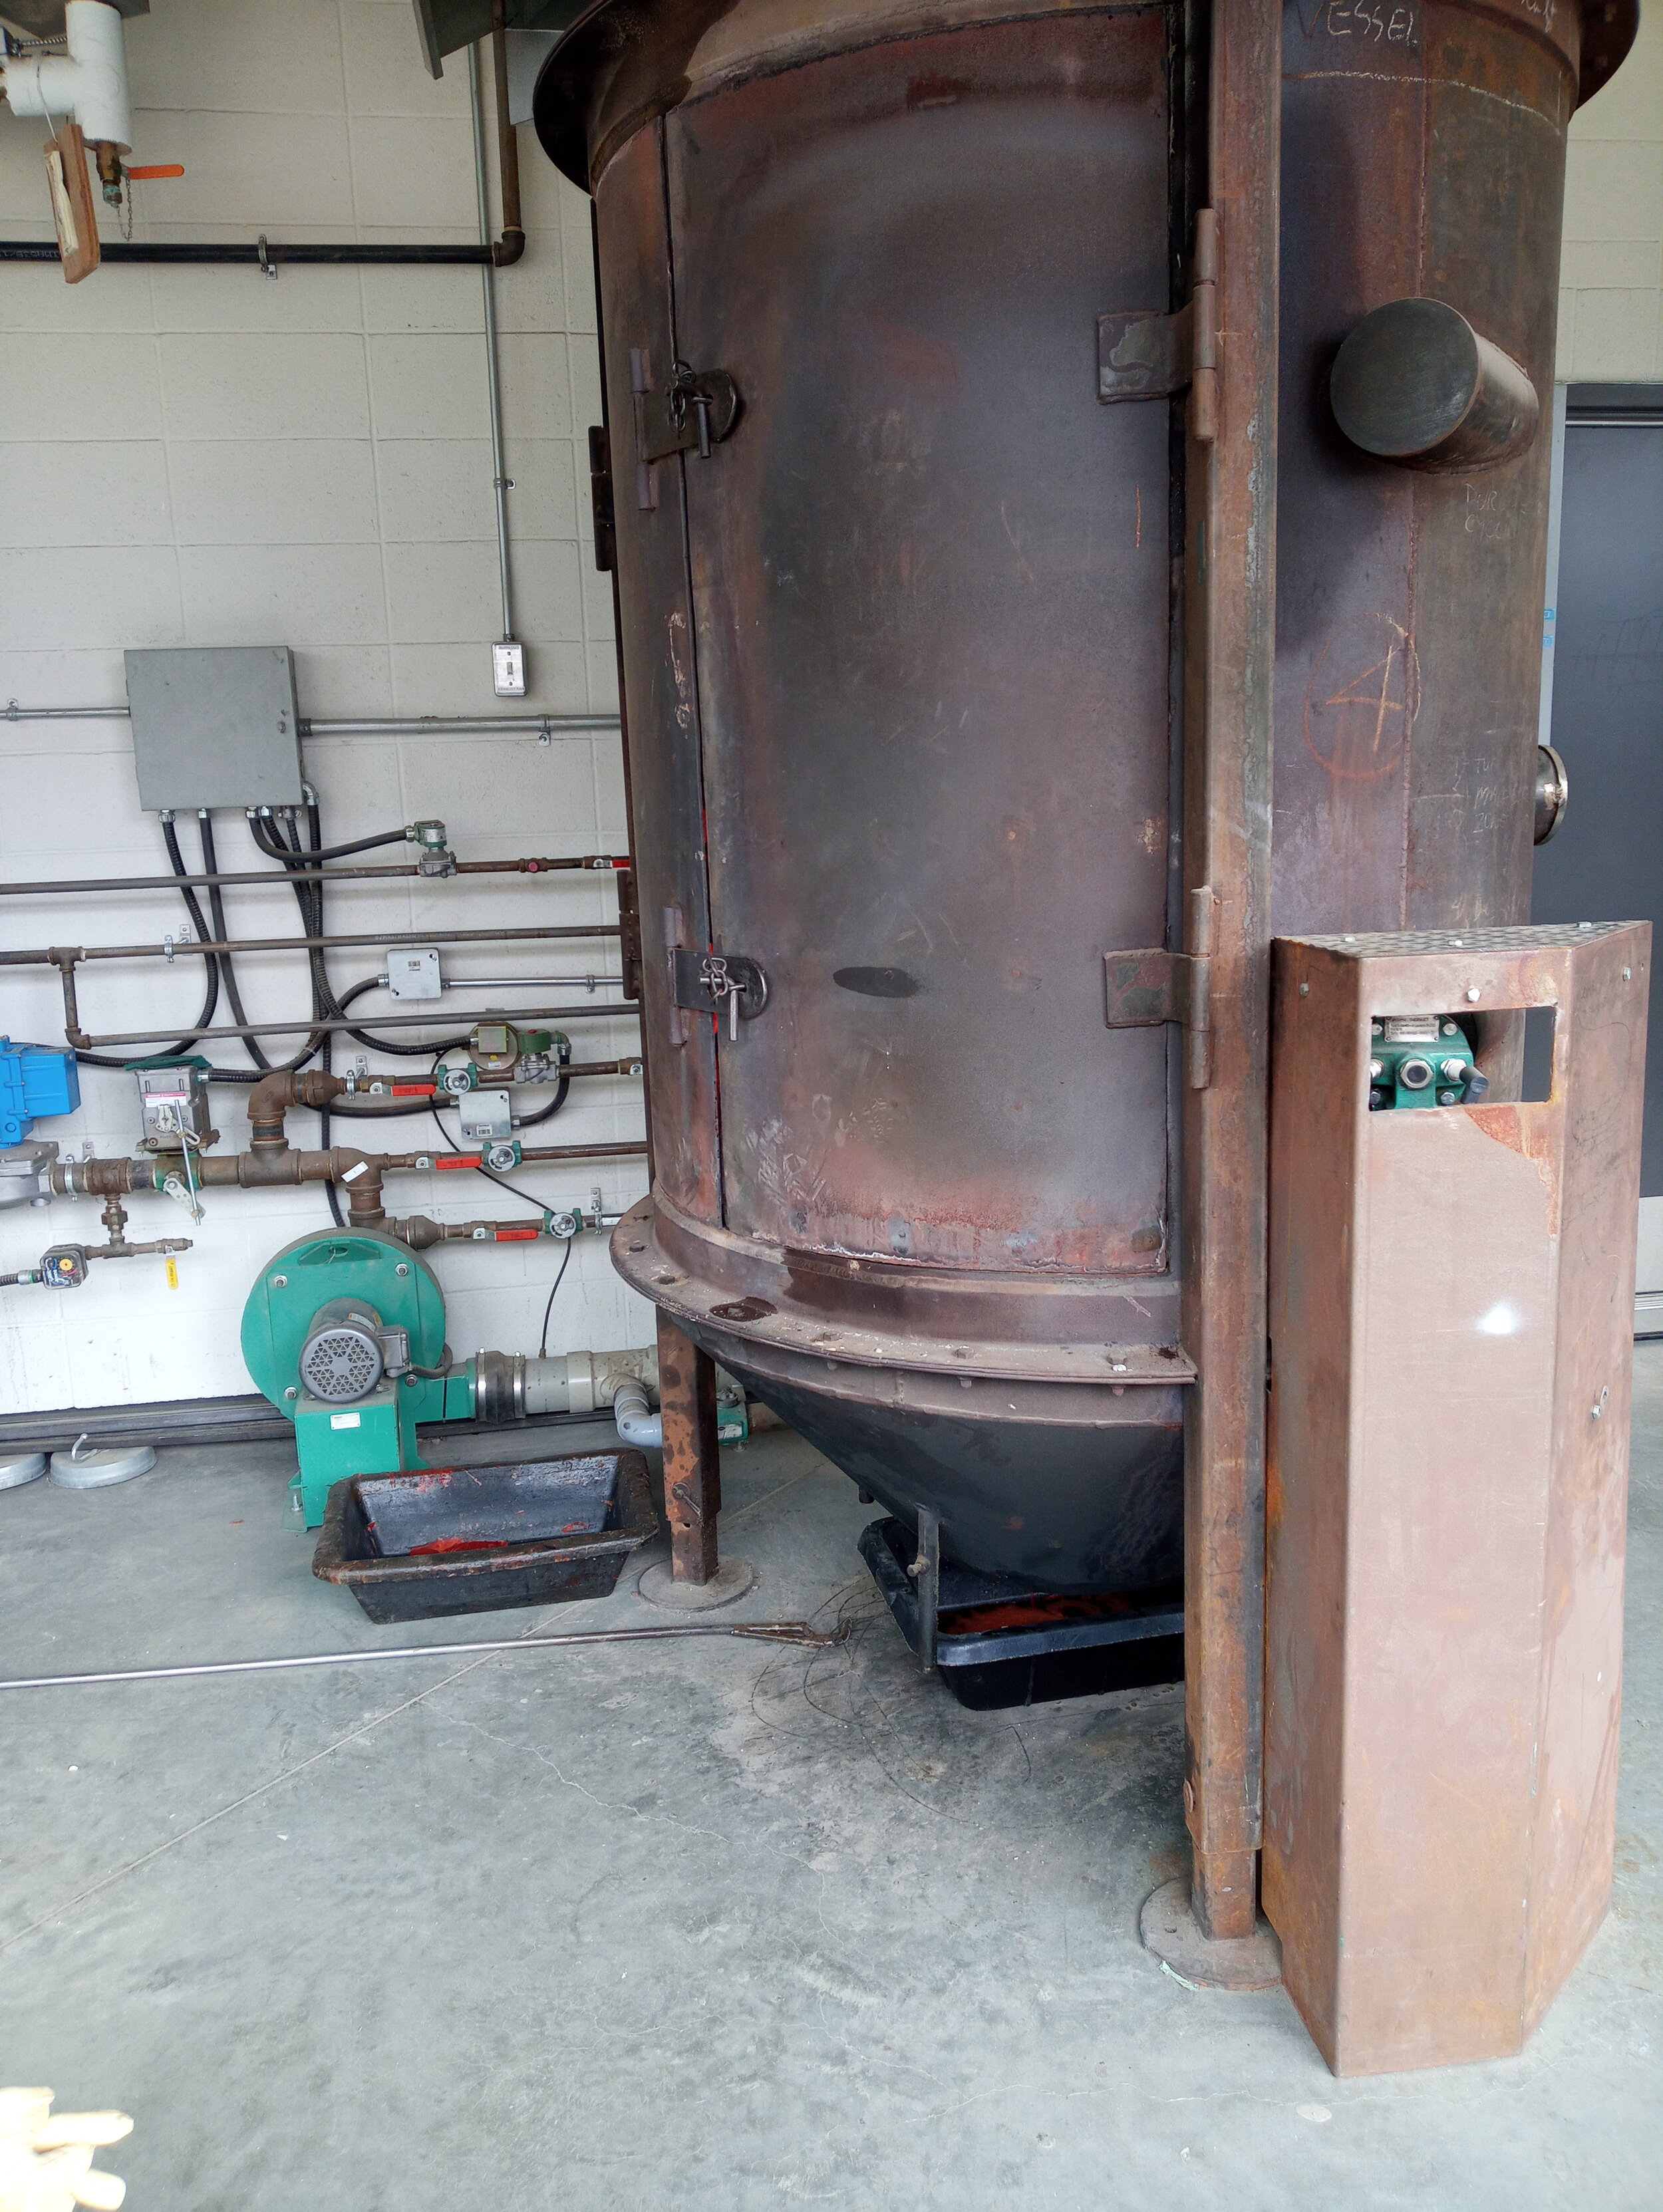
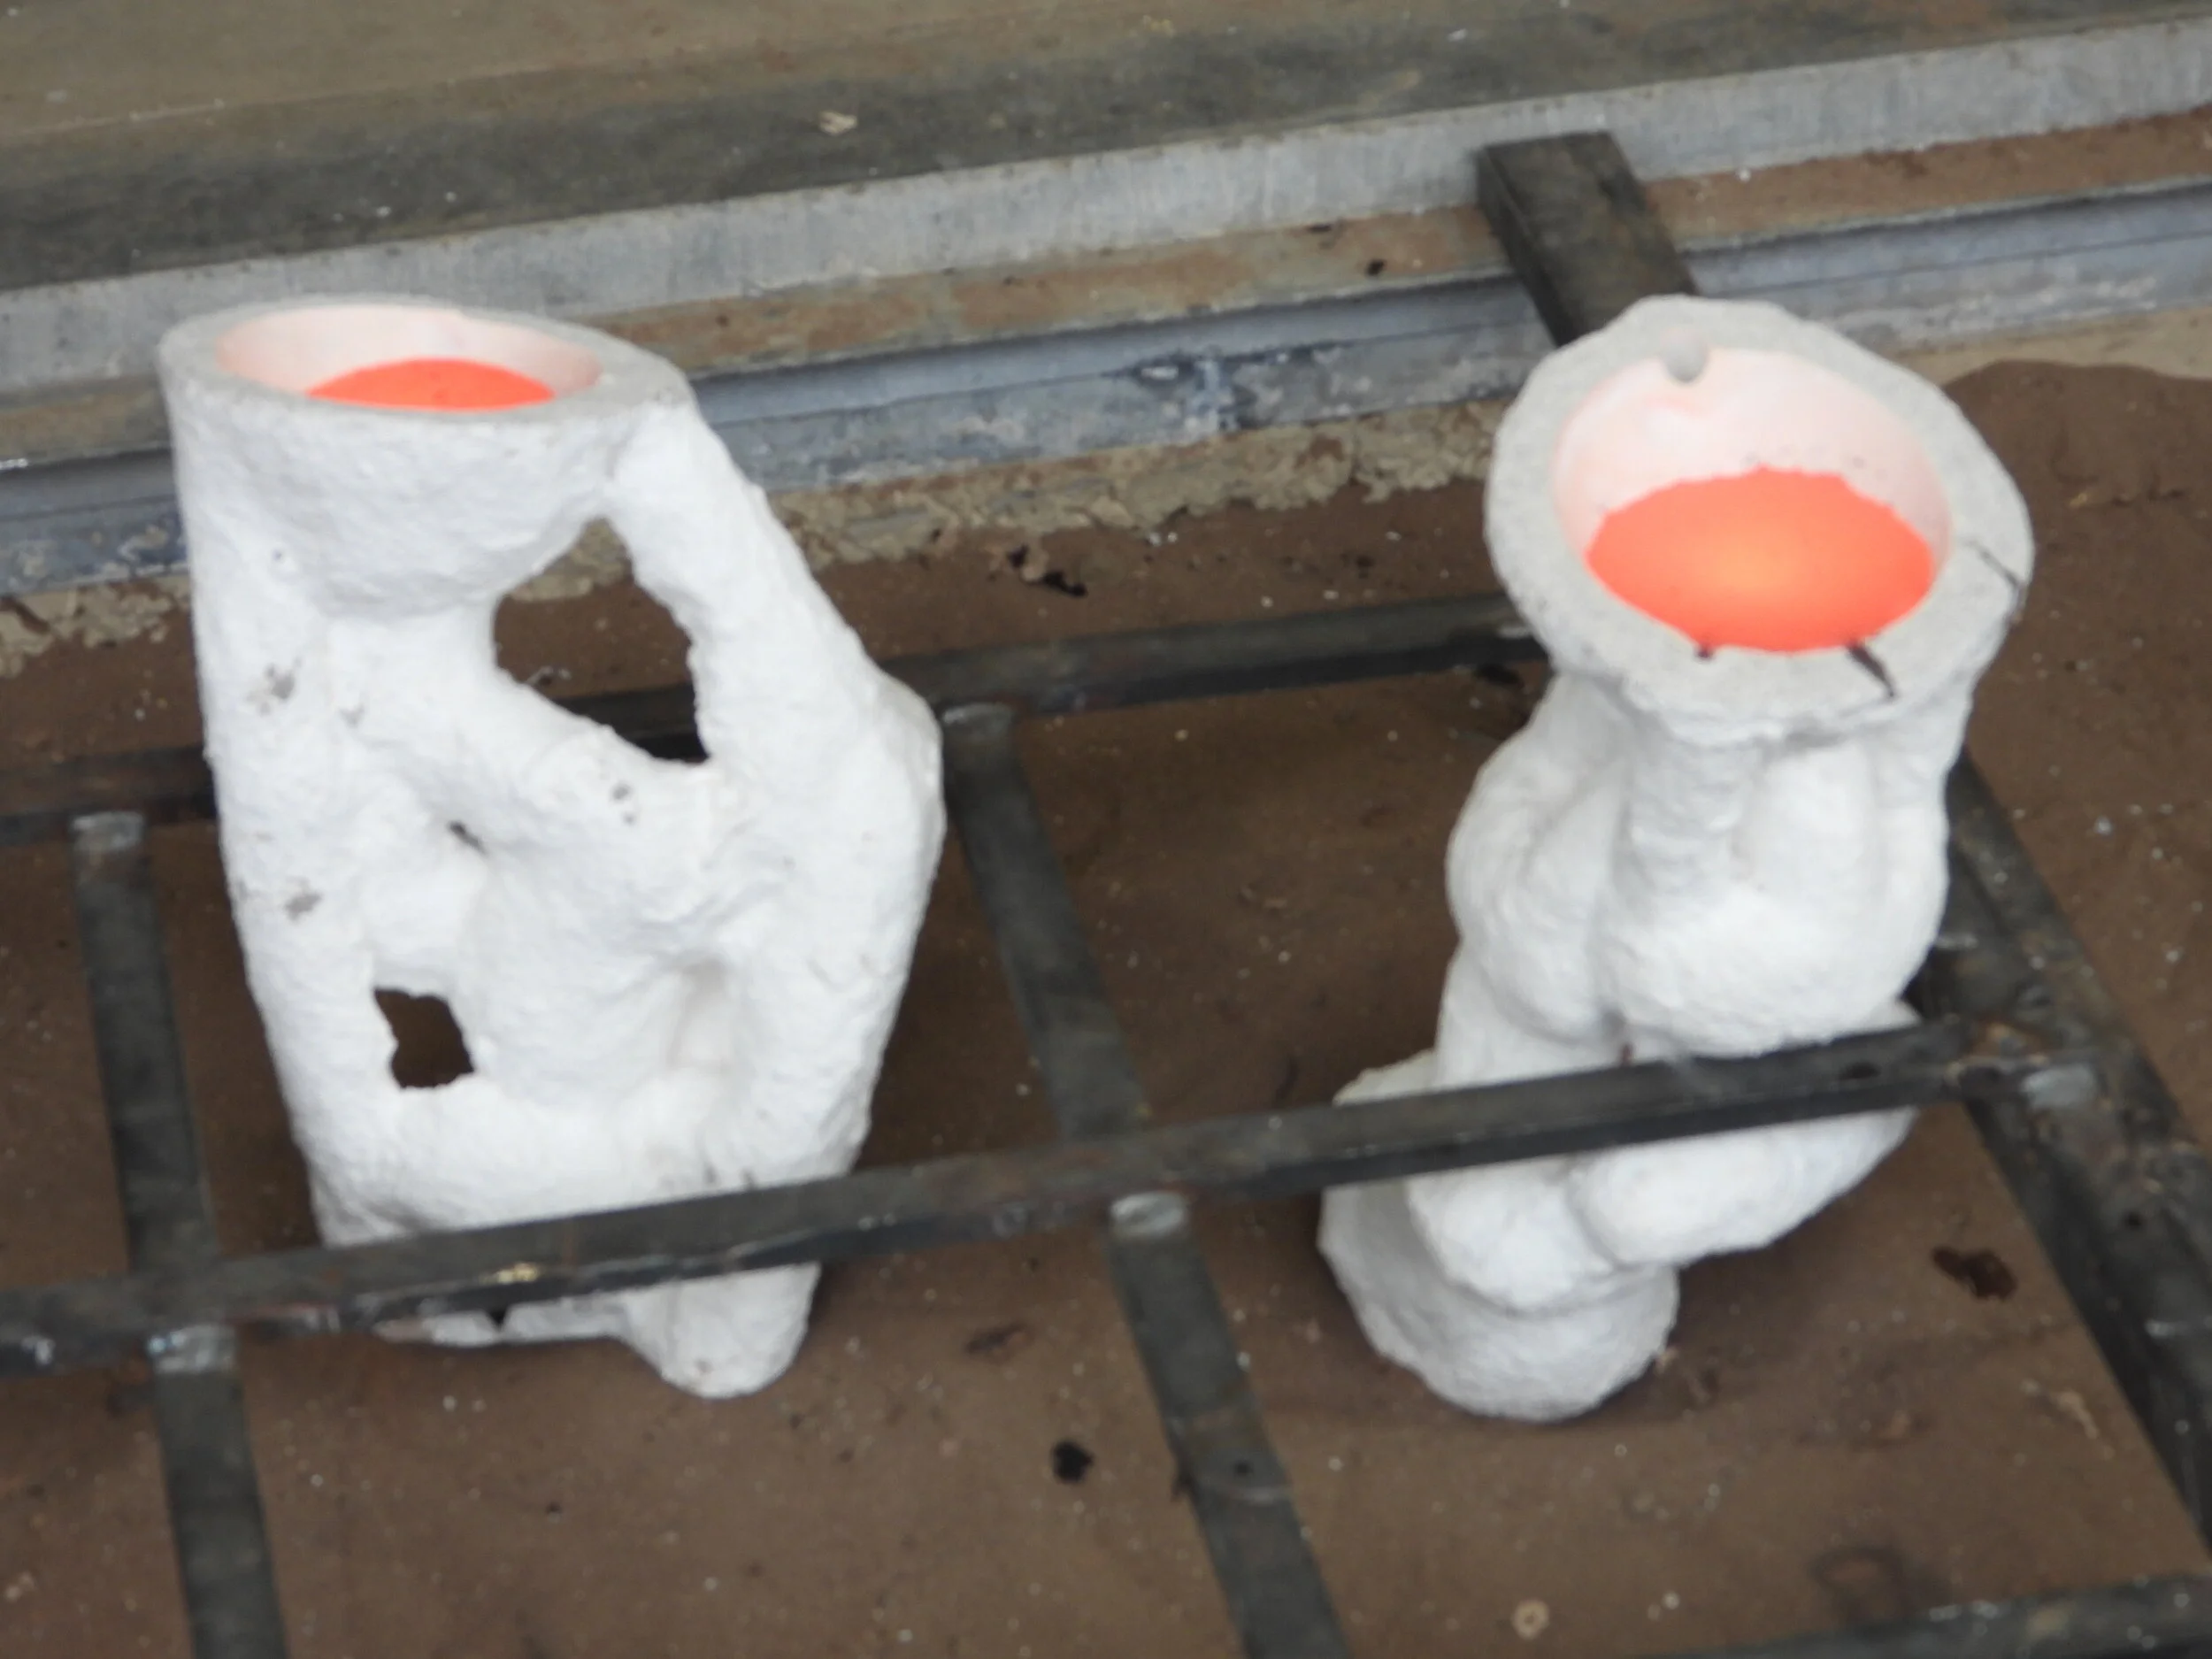
Melting Out the Wax
The ceramic and wax piece is put in a “furnace” where the wax is melted out (this is where the term lost wax was comes from) leaving a void which is an exact copy of the wax sculpture.
Shown are several pieces in the “iron maiden” at Red Deer College’s foundry.

Creating the Bronze Sculpture

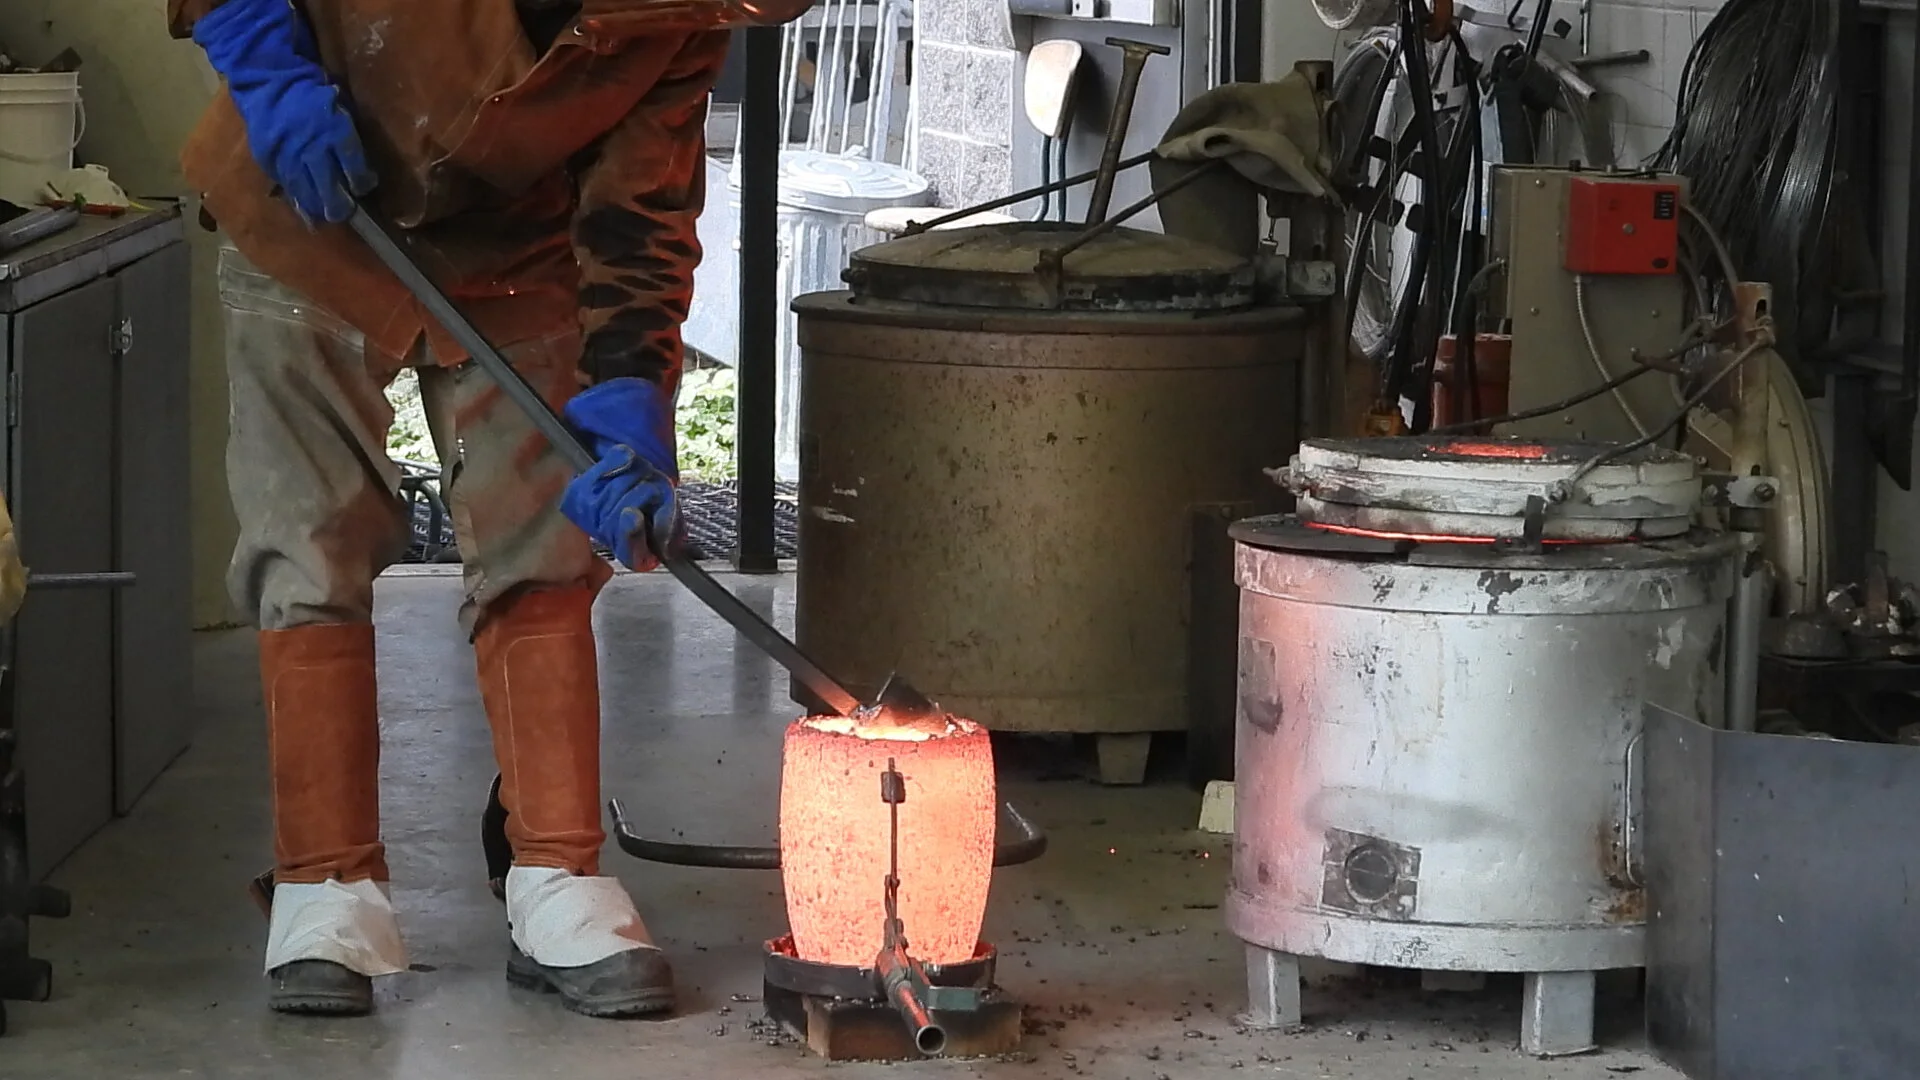
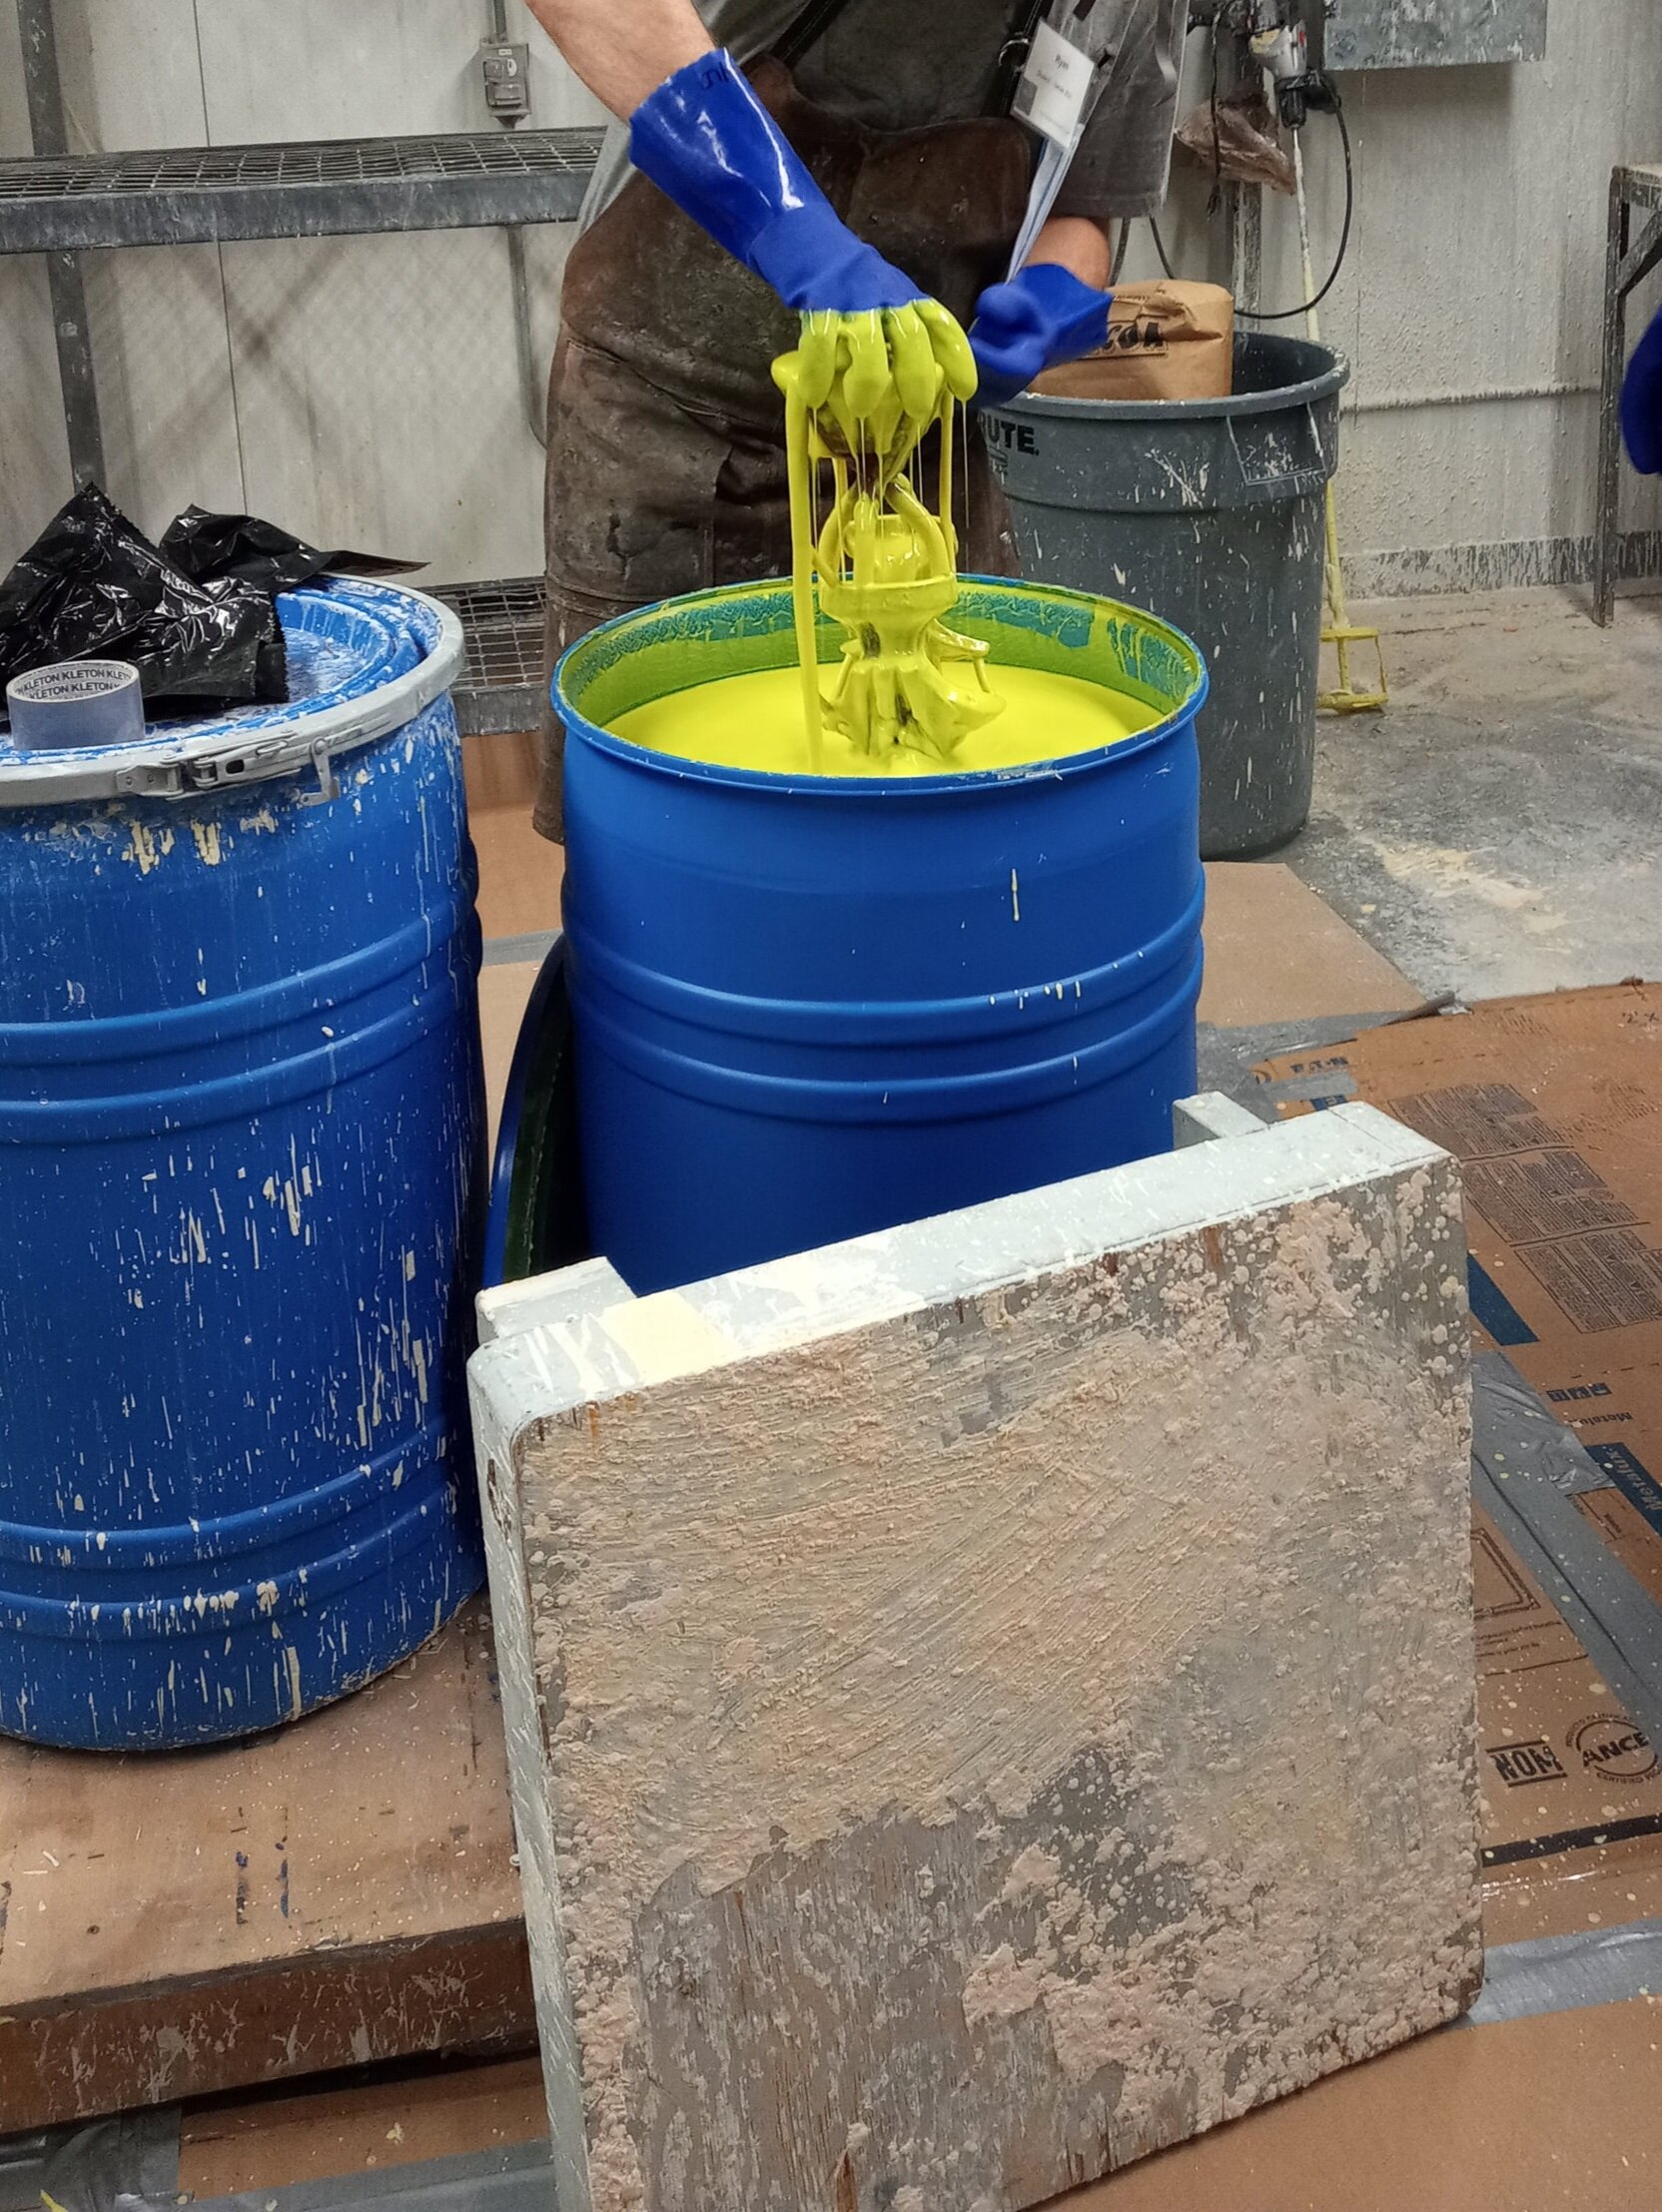
Molten Bronze
Bronze is liquified in the crucible - which is heated up inside the burner/oven. Impurities that rise to the top are removed, then the molten bronze is ready to pour.
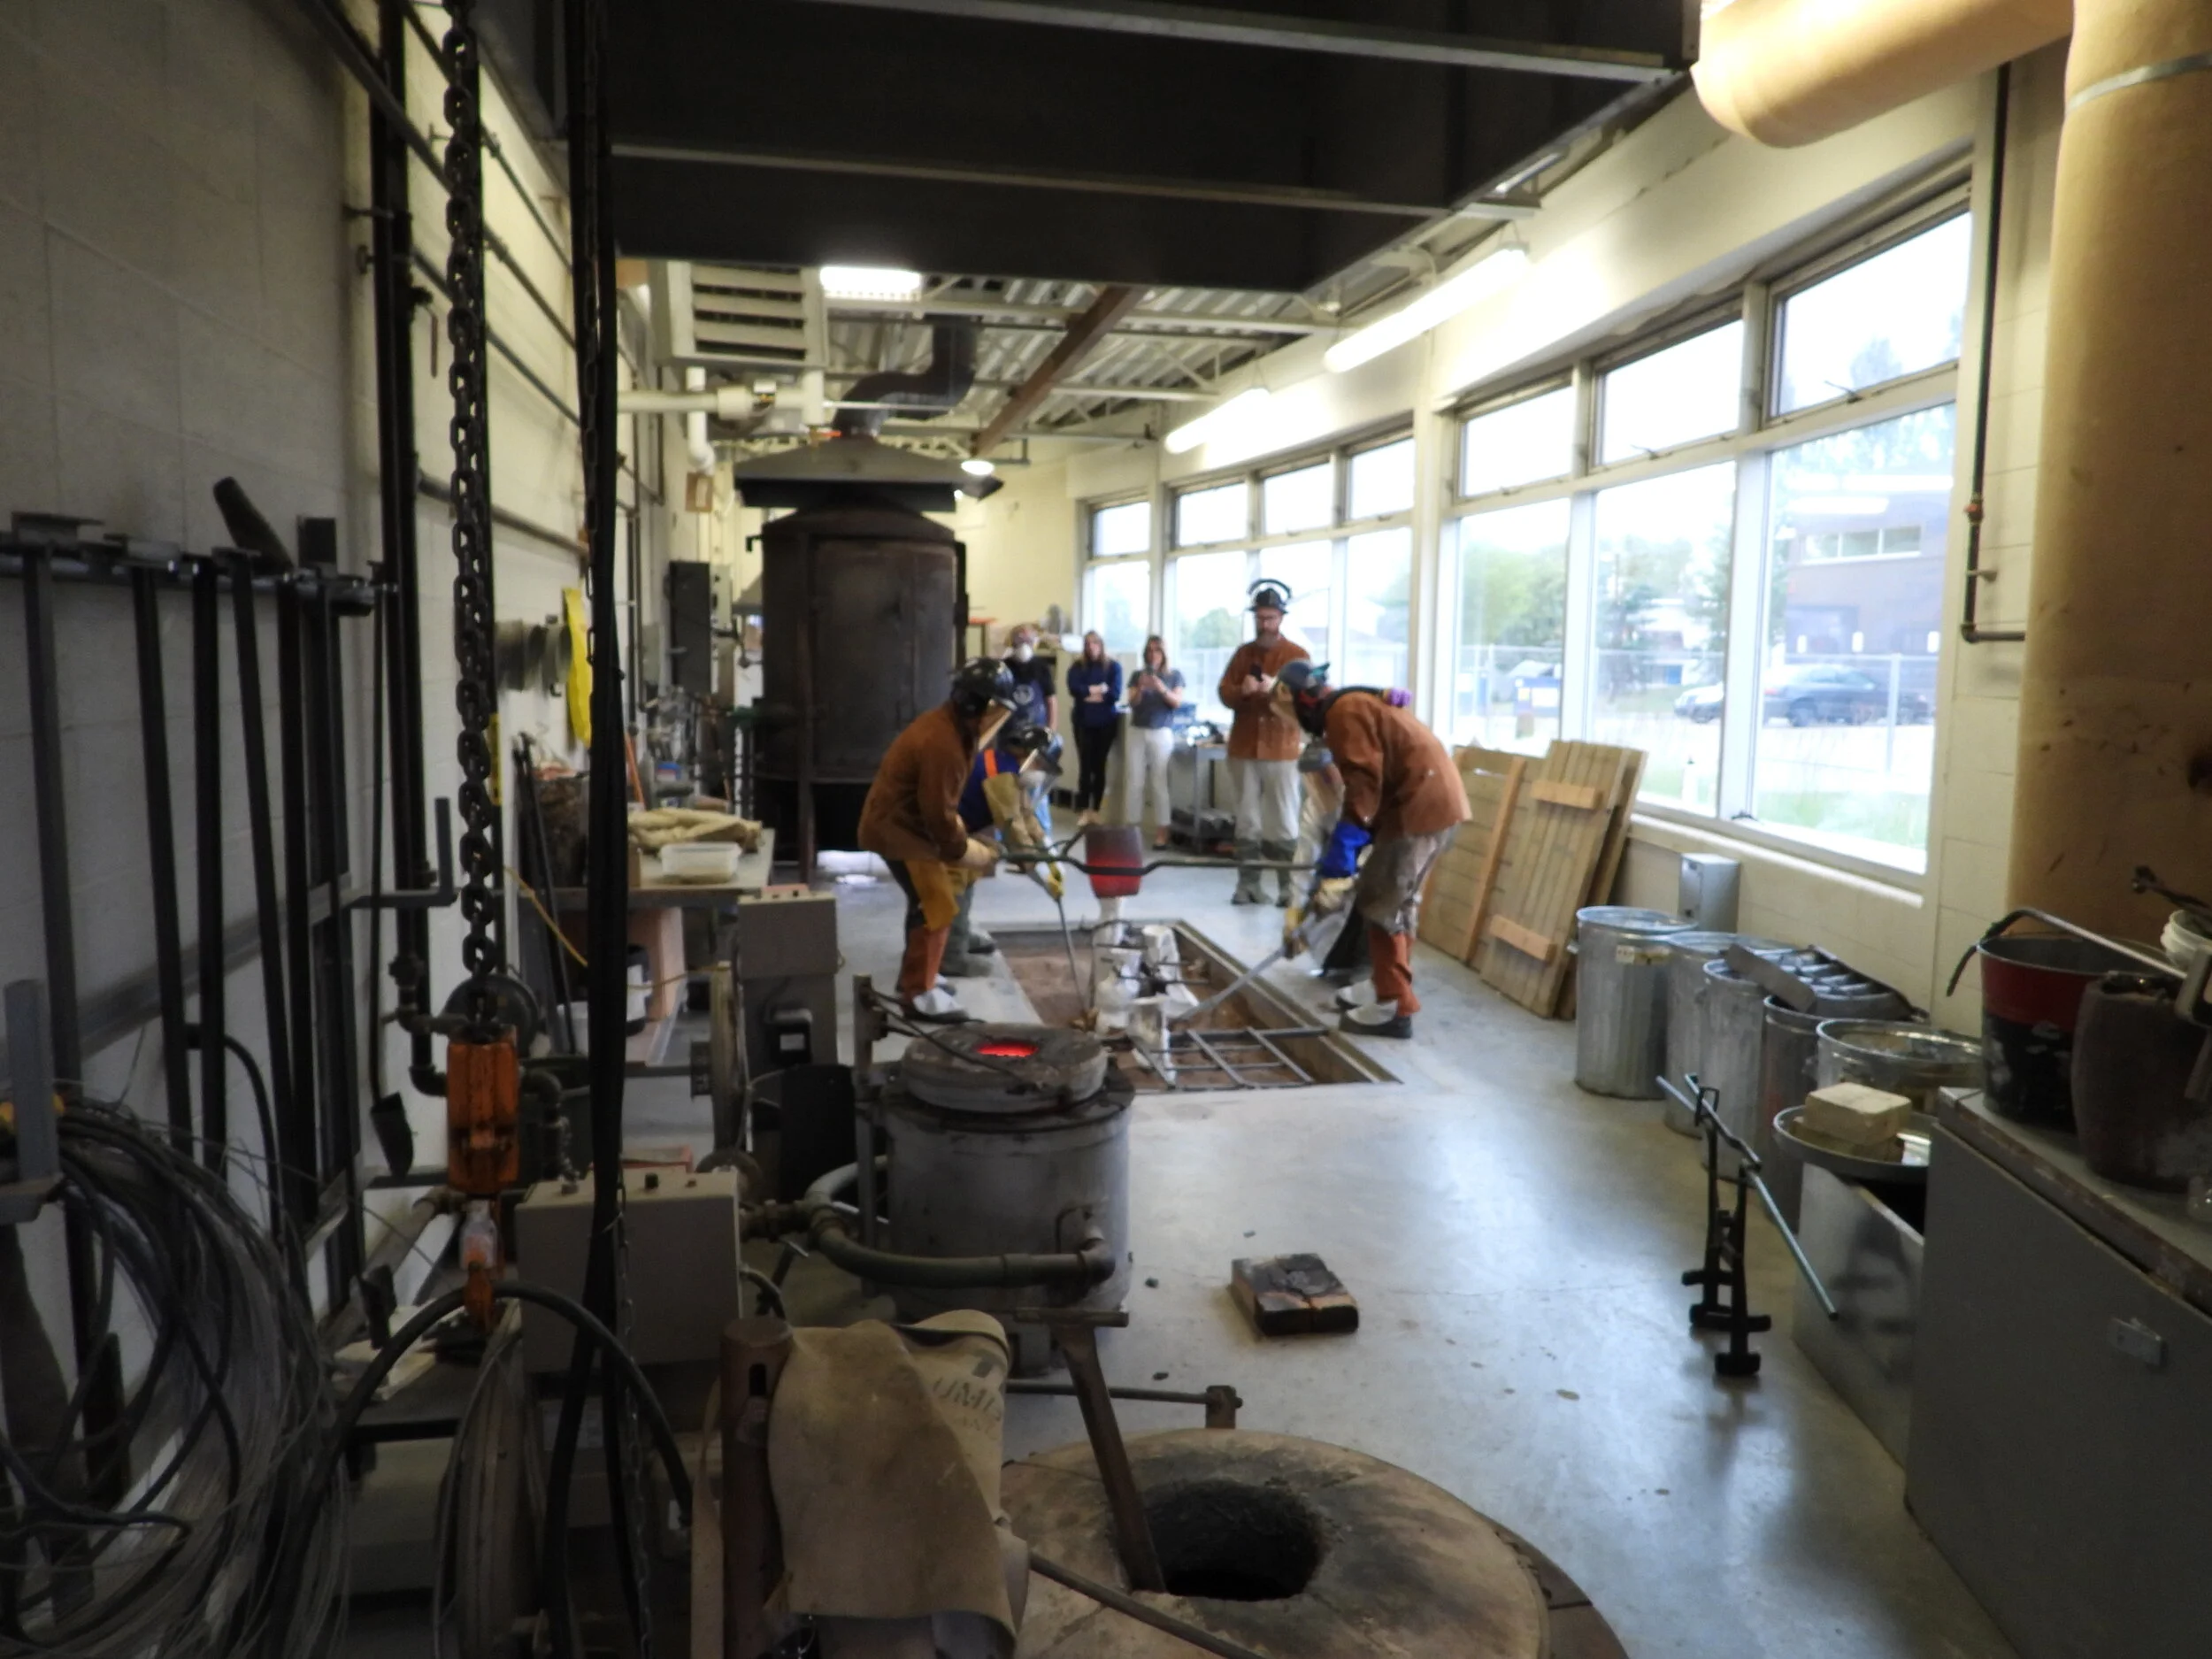
Pouring the Bronze
The liquid bronze is poured into the heated ceramic shells. They are left to cool for several hours, or can be immersed in water to be “quenched” for faster cooler and different effects.
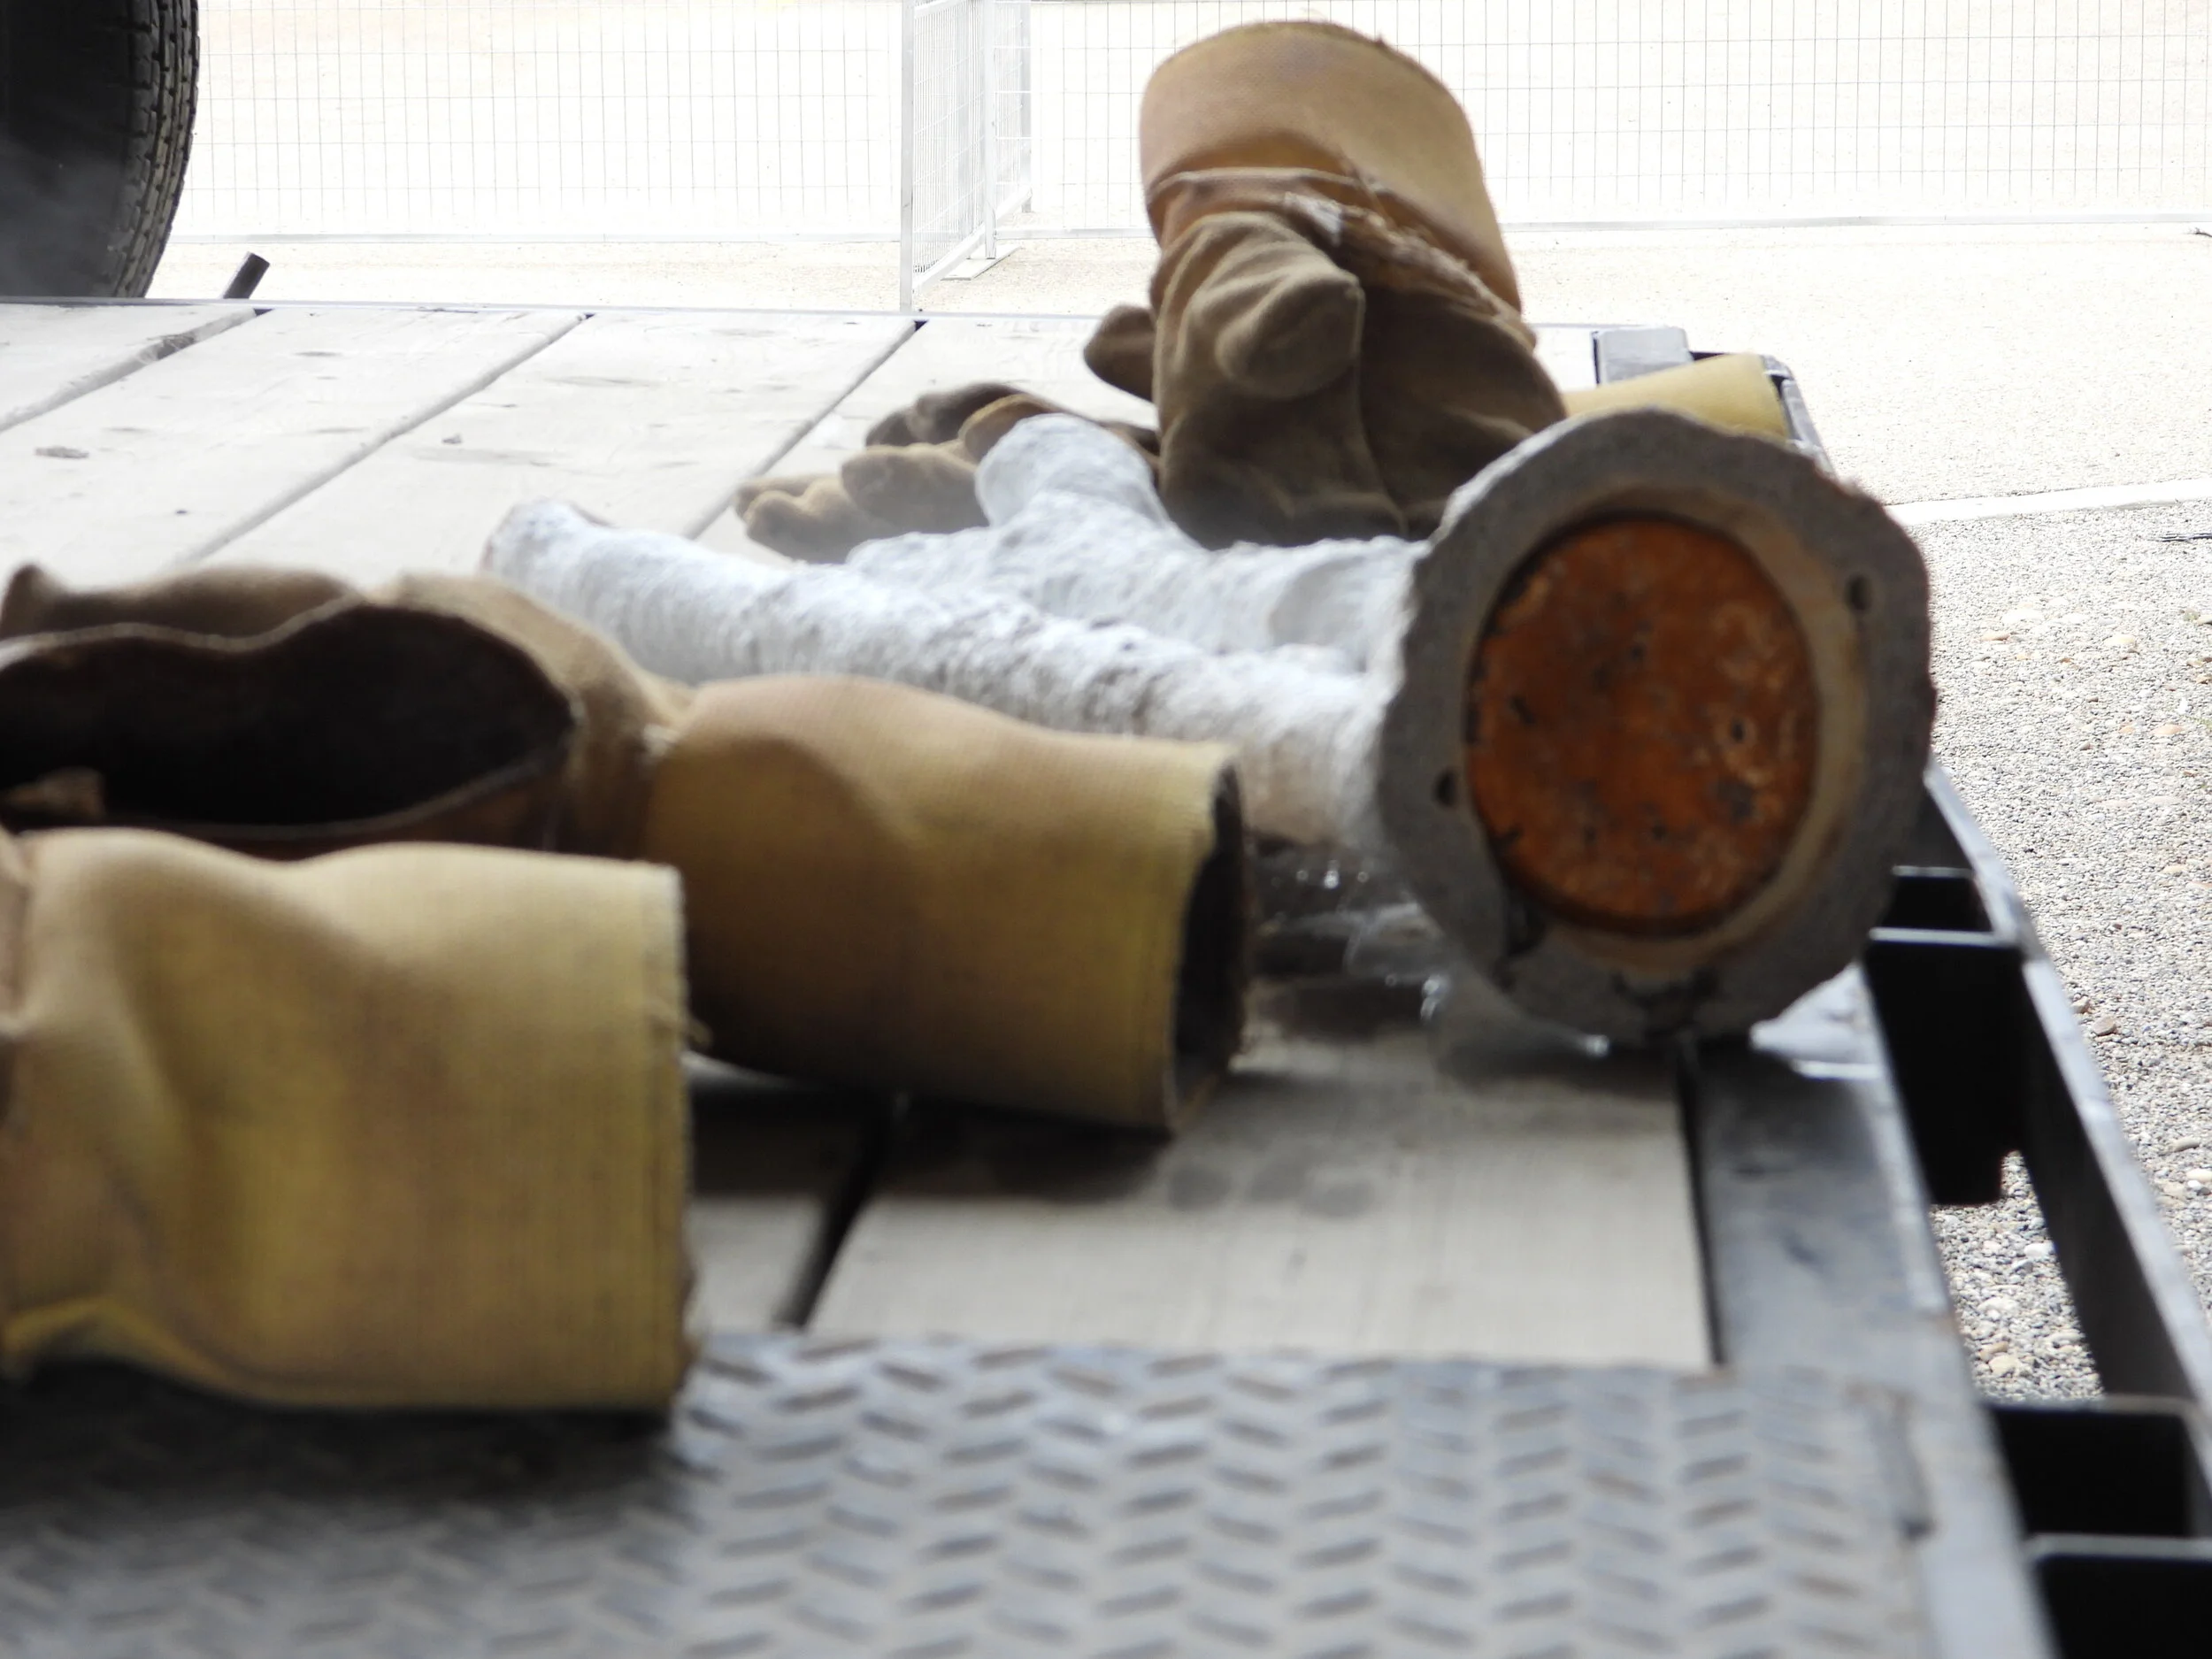
Breakout, Welding and Chasing
The bronze is broken out of the ceramic shell with sledge hammers, air-tools, chisels and hammers. Then the piece is cleaned and welded back together. Next the bronze sculpture must be “chased” using grinders, sanders, dye grinders with metal bits and Dremel tools to clean, repair, smooth and correct details lost in the casting process.


Sandblasting and Patina
The sculpture is then sandblasted, polished, sanded, and checked over for any final corrections or changes. Finally patina is added; chemicals that react with the bronze like “liver of Sulphur”. The bronze sculpture must be heated and the patina is applied “hot” by spraying or painting it on and then torching it. The sculpture needs to be waxed or sprayed with a sealant afterwards.


FINAL BRONZE SCULPTURE
Dash
Finished August 2021